
Diagram + Description
Diagram + My Notes

Diagram + Description + My Notes
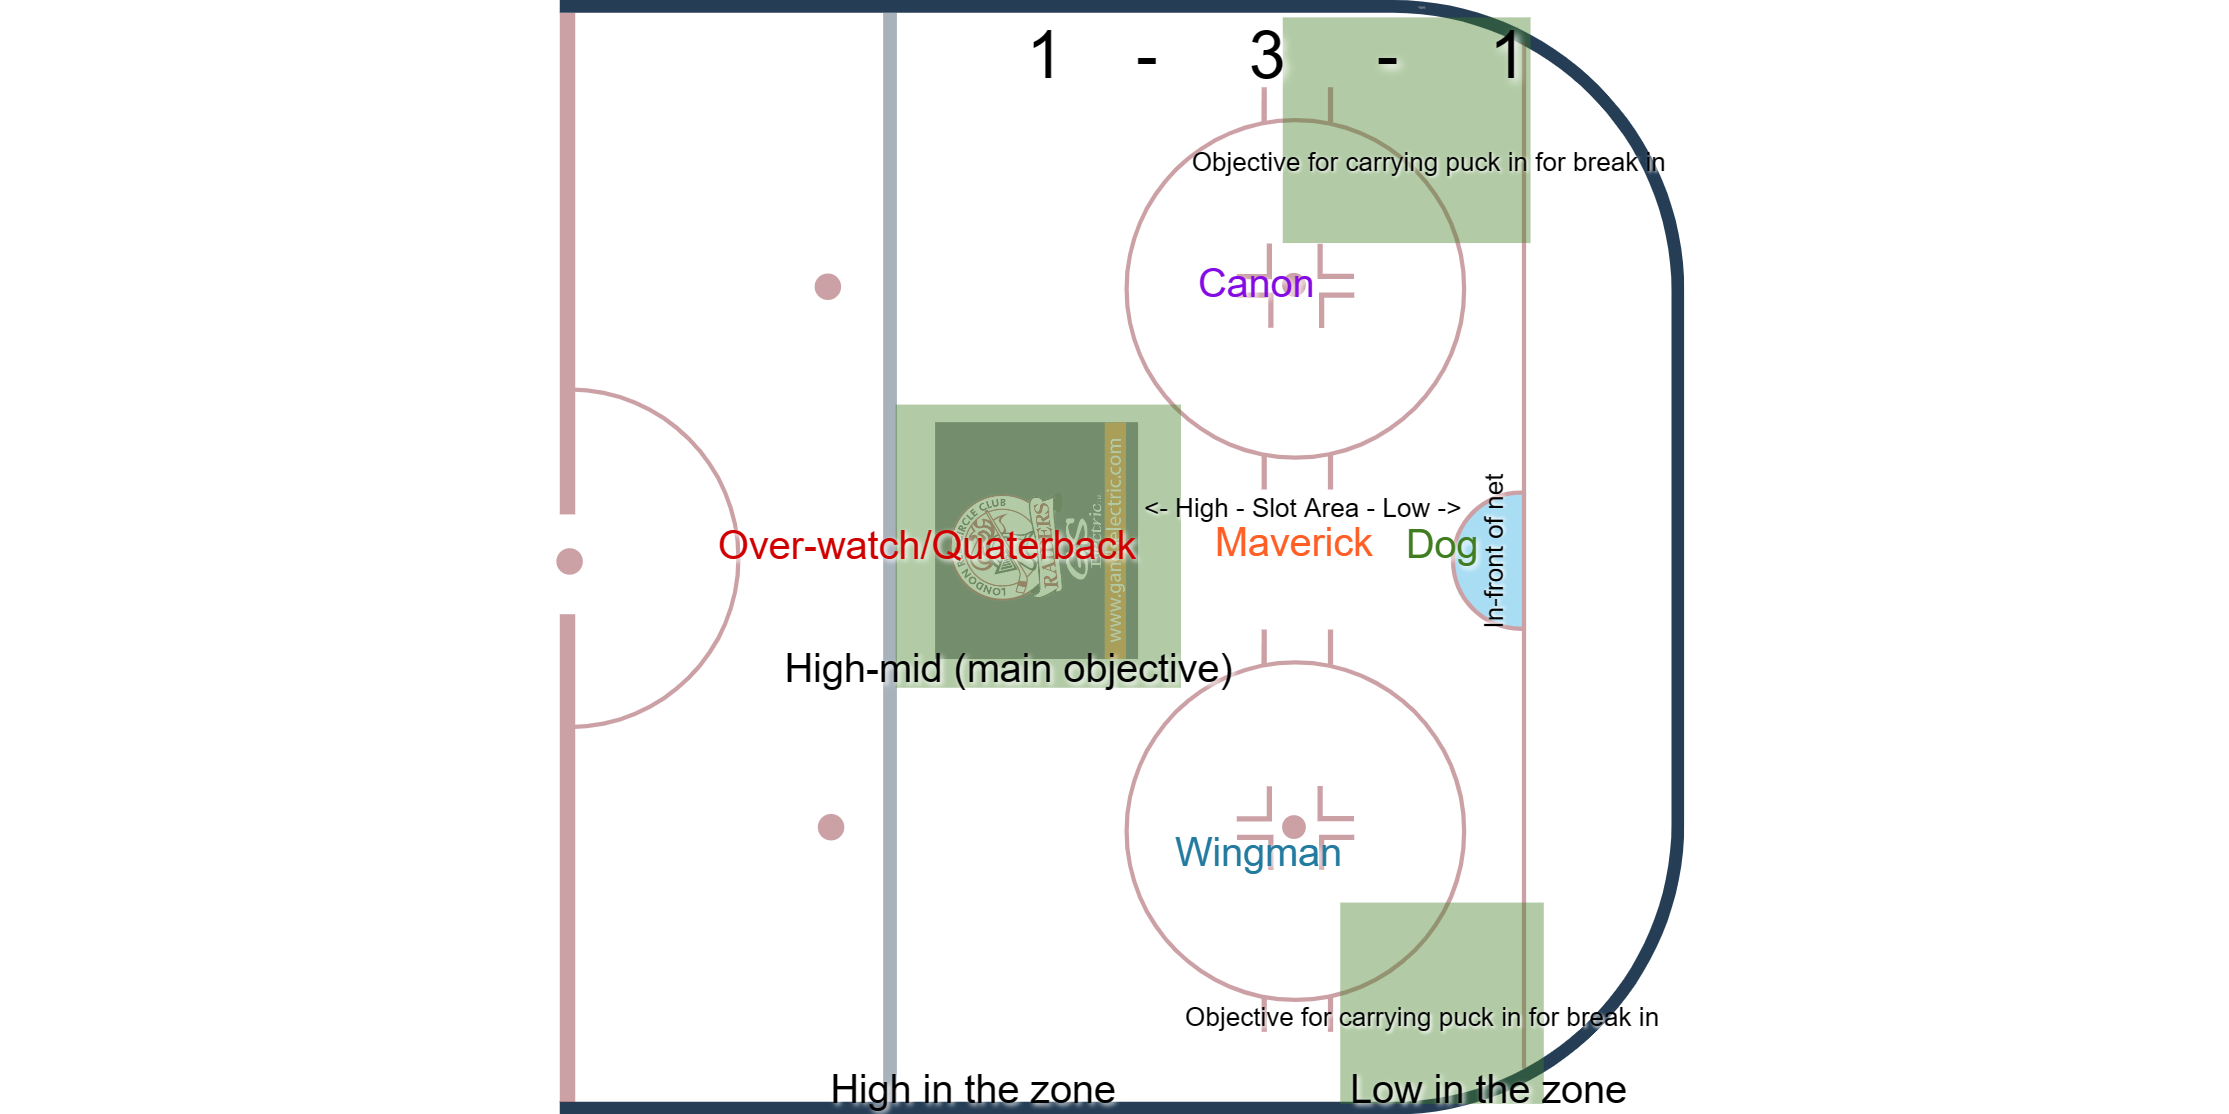
1-3-1 Powerplay
1-3-1 Powerplay
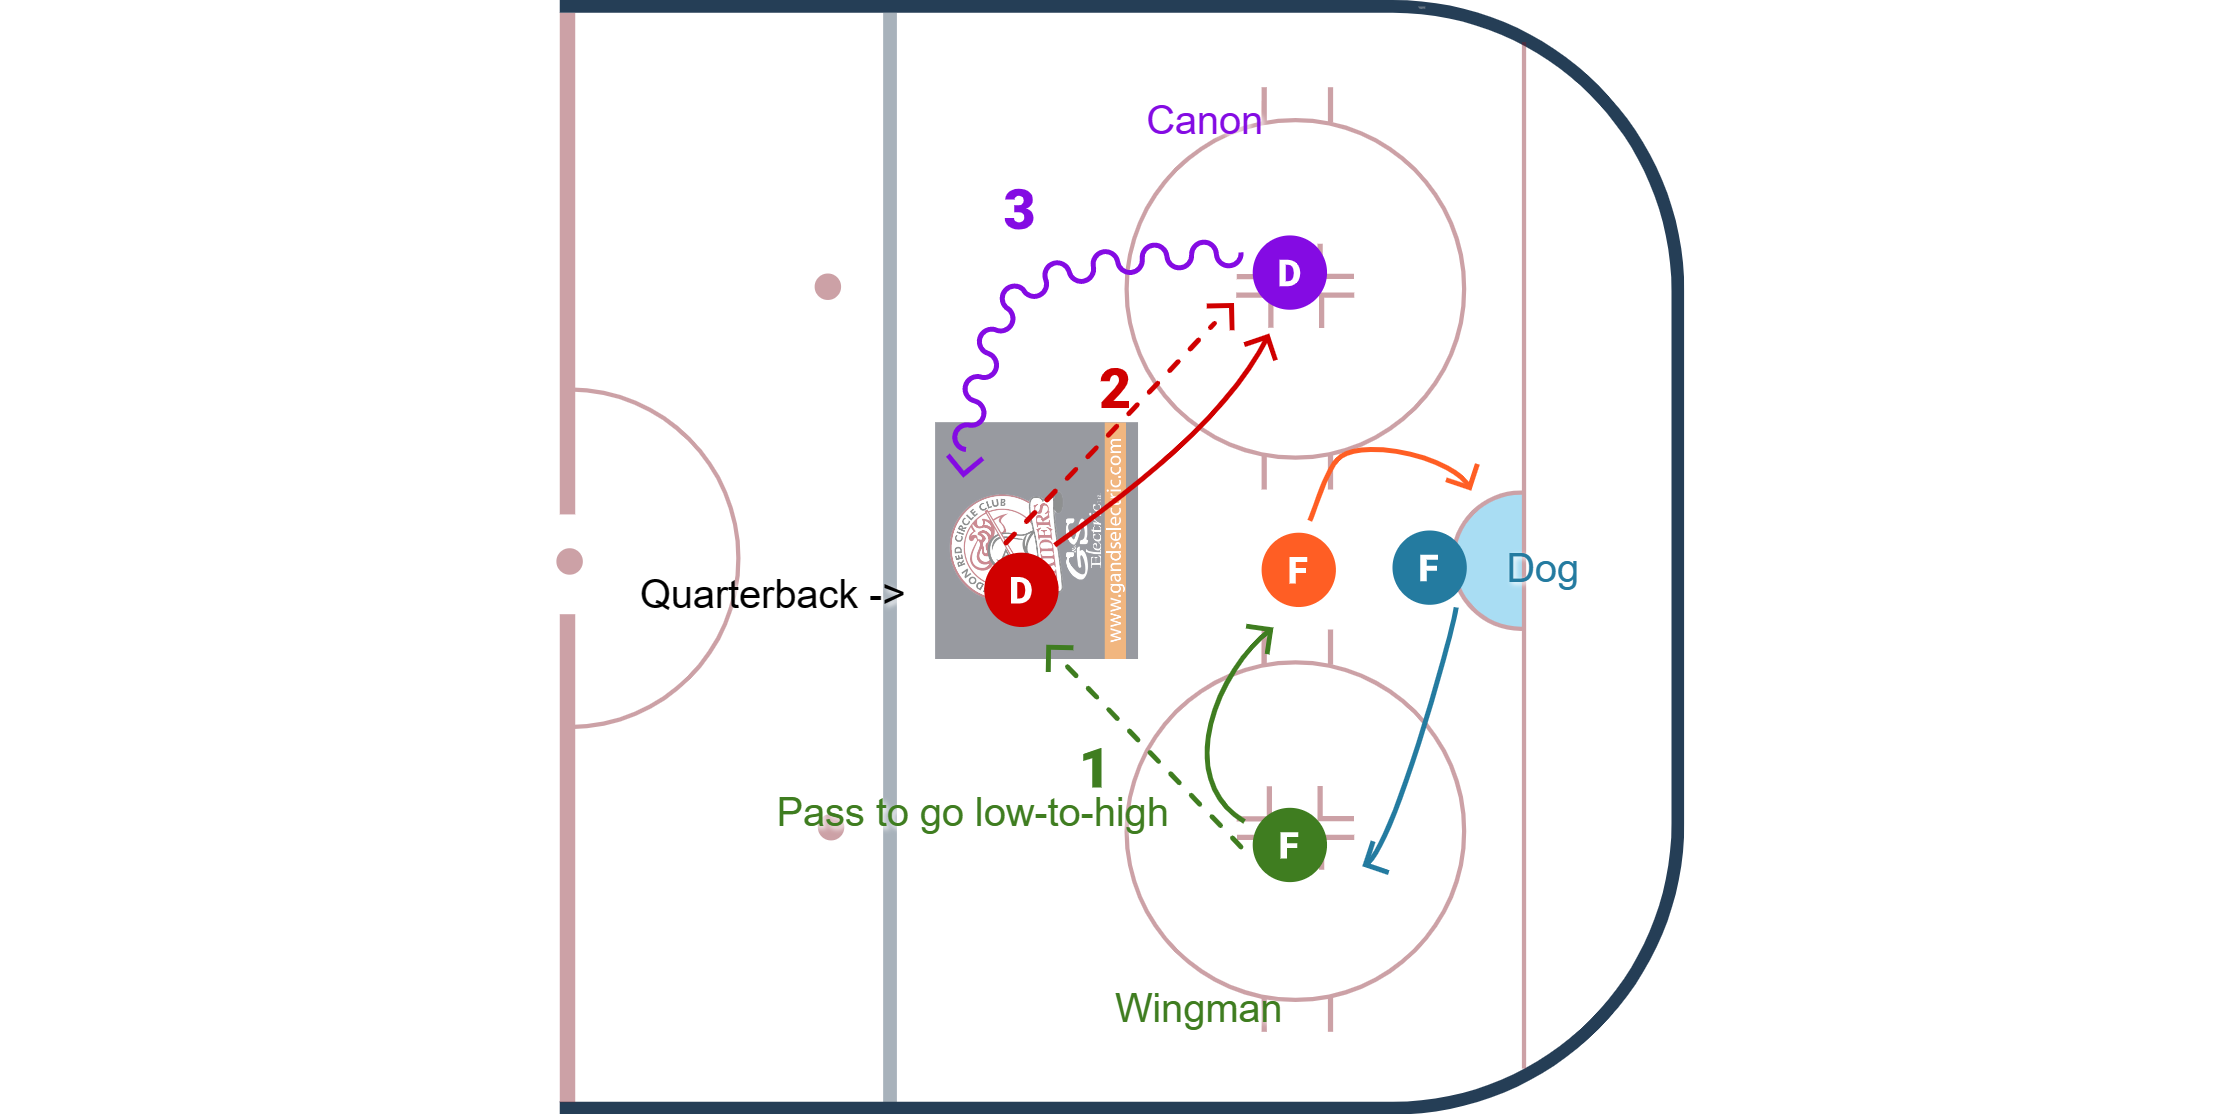
Quick point on drawing meanings:
- Solid lines with arrows are skating directions (no puck) - Double line at end is a stop
- Dotted lines with arrows are passes
- Wiggle lines with arrows are showing skating with the puck
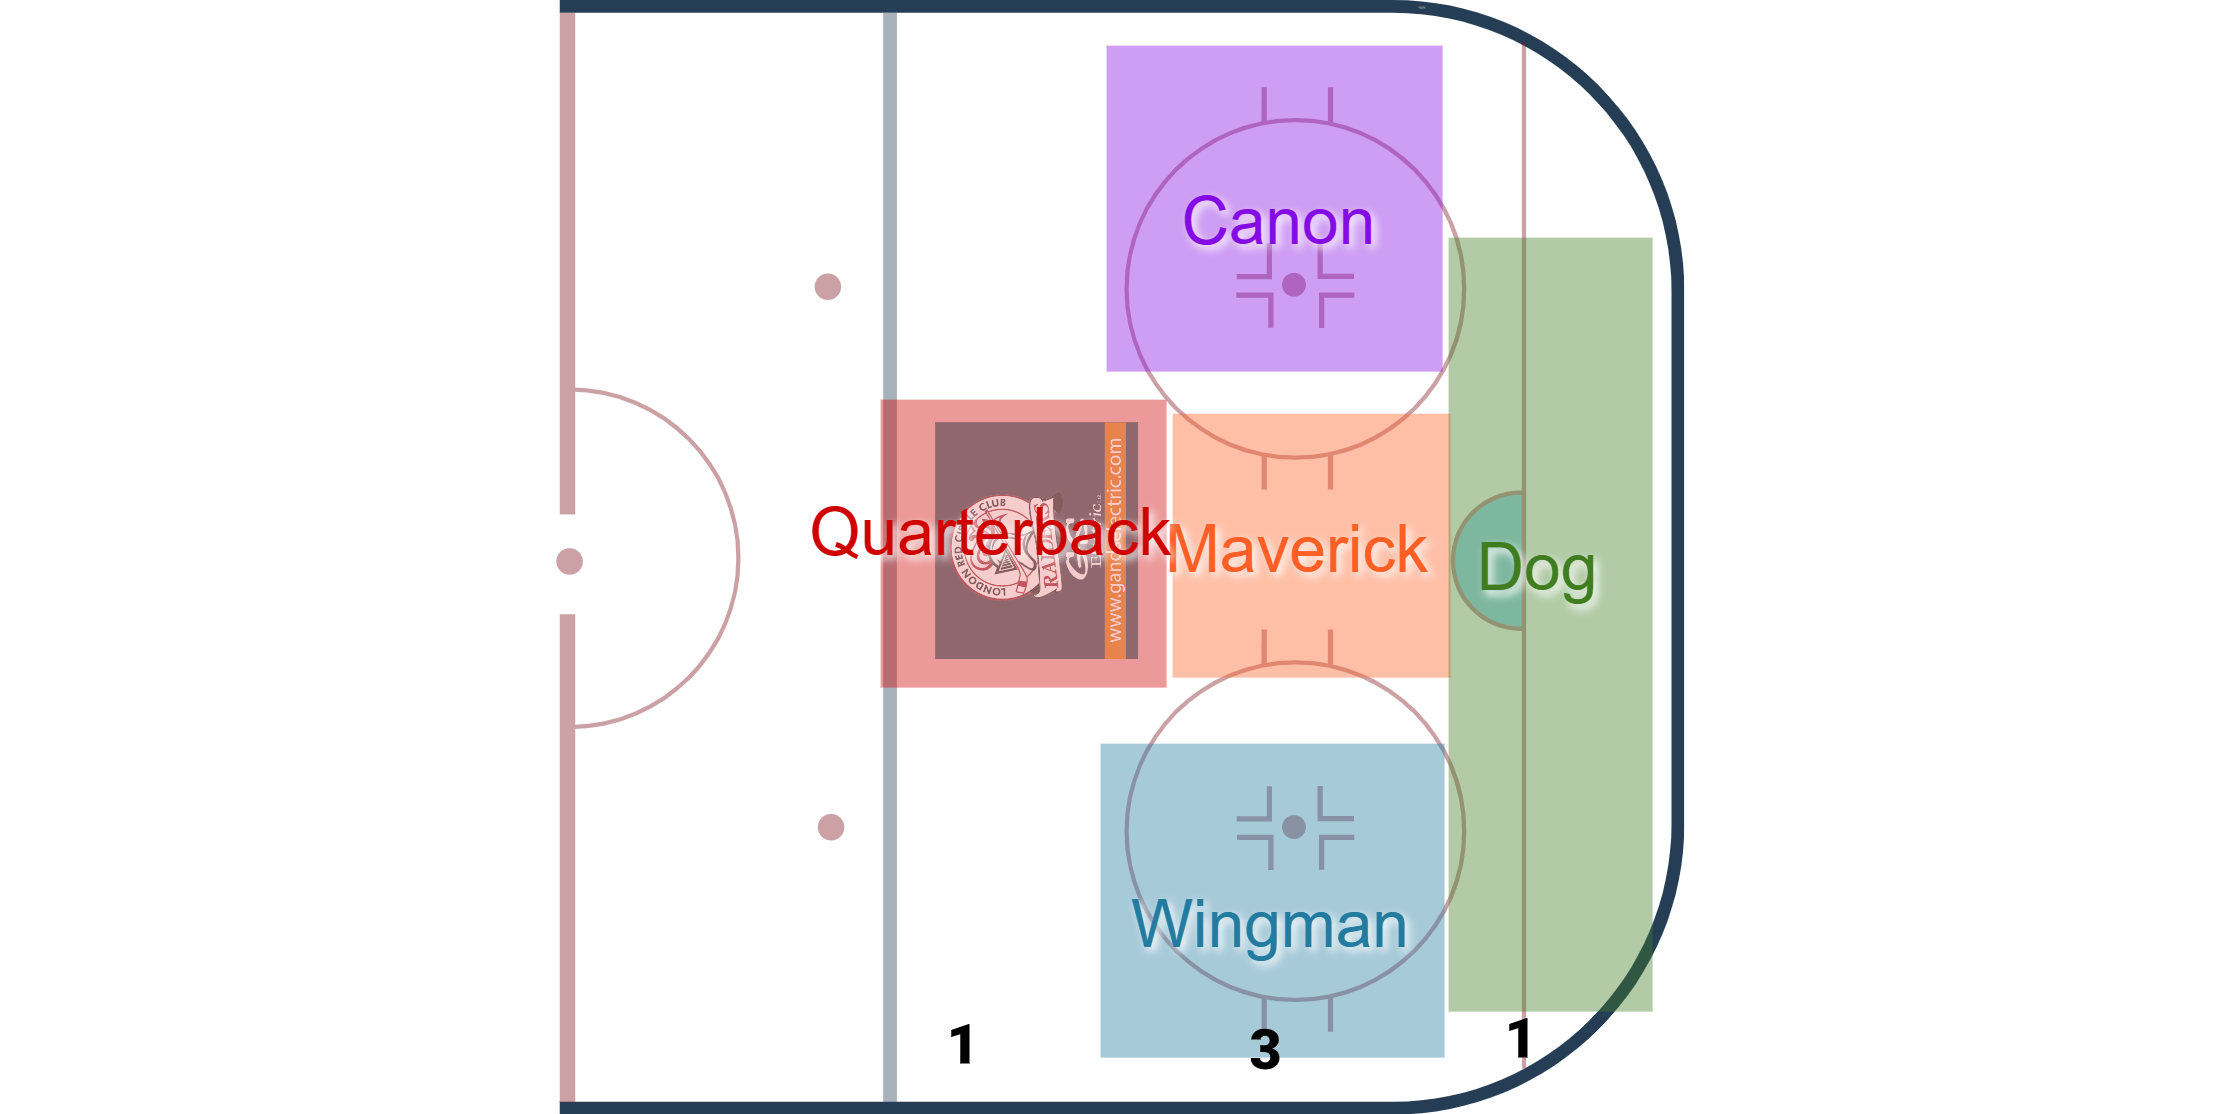
Names for 1-3-1
- "Quarterback or Over-watch" - the first 1 in 1-3-1 - controls the flow, has full view of ice and how we are set up - Oversees the cycle or play
- "Canon" - the outside (usually defense player) in the 3 in 1-3-1 - backdoor option (trigger person or "Canon" for one-timers or shot) on set play, and supporting over-watch to be an outlet with objective being to control the high-middle of the ice
- "Maverick" is dangerous - our slot player - first option for set plays most often - tough for D to cover in 1-3-1 and our middle person in the 3 of 1-3-1
- "Wingman" (usually one of our forwards) is there to support the set up of our set plays - Can also support the 'over-watch' position in the cycle battle to control mid-high in offensive zone
- "Dog" is our go-getter. Starts in front of the net, but goes to get the puck out of corners - Canon and Wingman should support getting the puck when it is in the corner and not under our possession. Dog also is the key player in our set play(s)
First diagram - Objective
- Concept is to own the middle of the ice and have PUCK CONTROL
- When we are breaking in, we need to CARRY the puck low into the zone, then move it high to the D
- Once we have the puck back high in the zone, D can pass to middle, skate to middle or cycle with the forward on same side who has the same options
- The shape of 1-3-1 doesn't change - when in doubt, see where there are more than one player and adjust back into the shape
Second diagram - Cycles
- Shows how we cycle and keep our 1 (Quarterback) high and in the middle of the zone
- The 1-3-1 alignment stays the same shape, but players are always moving in the direction of the pass or skater to fill the gaps and cycle
- If you look there are really two circles. The forward or low circle and the defense circle - the circles always move in the direction of the pass from Quarterback (so the diagram can be flipped if the Quarterback passes to Wingman and in this flipped scenario the circles are left or counterclockwise
- If quarterback cannot get a clear shot, they can move the puck to Canon, or as an alternative, they can move it to wingman - either way, they follow the pass
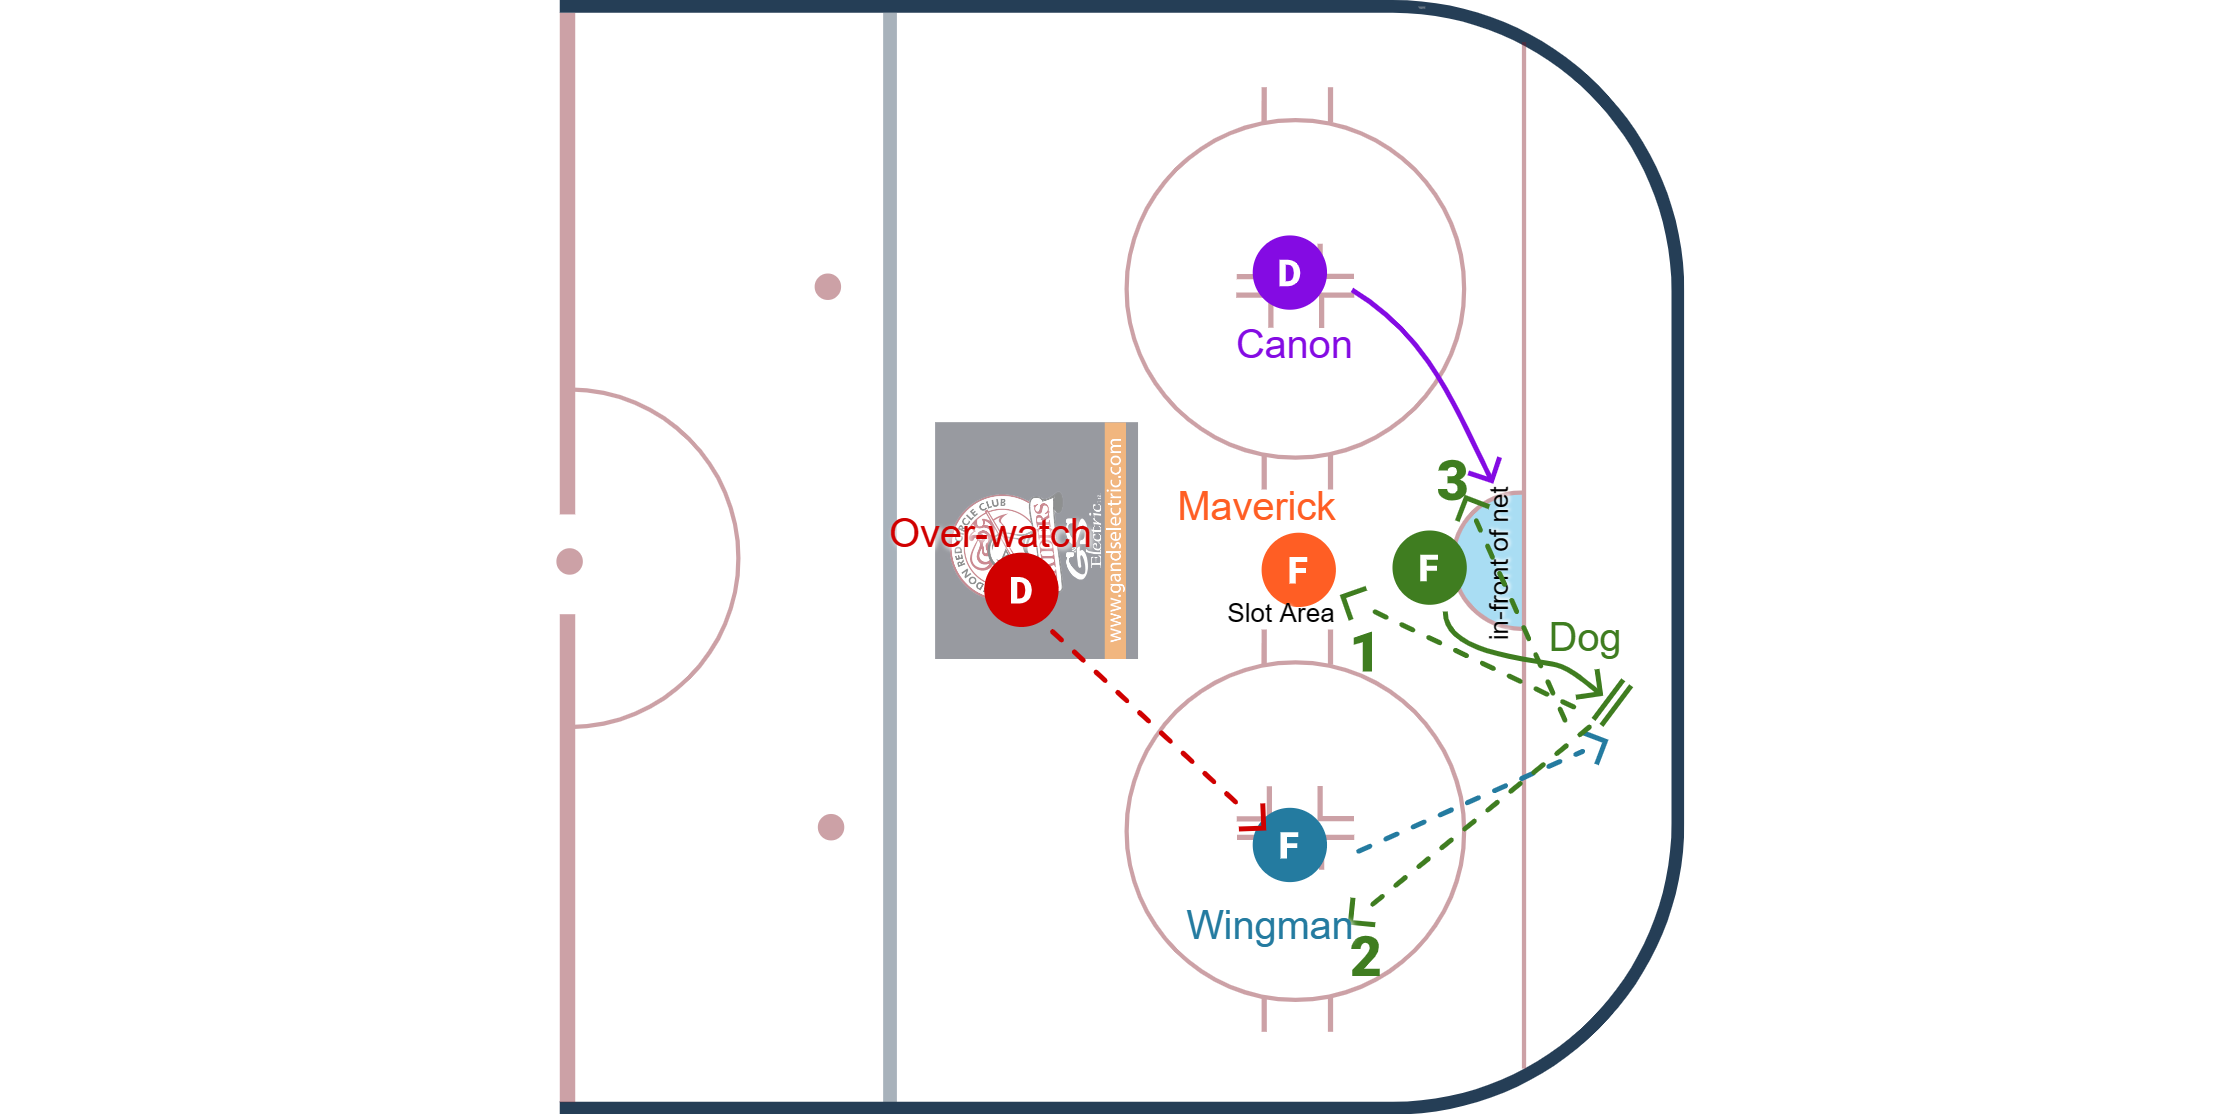
Third diagram - set play 1- low-to-slot option (we have not practiced this as of Jan 17)
- Low (Dog)-to-slot (Maverick) option
- Our Quarterback (middle-high position or the '1' in 1-3-1) passes to Wingman
- Dog (second '1' in the 1-3-1) moves from front of net to corner area to get/fetch pass setting up to find a quick pass in front of the net from Dog
- Dog has 3 basic options from the corner + the option to just keep cycling (see next main bullet)
- Option 1 - Maverick - pass to slot for quick shot
- Option 2 - Wingman - pass back to wingman to start another cycle
- Option 3 - Canon - pass across front of net to Canon for tap-in goal
- If the options above aren't open, then Dog must CYCLE by skating towards Wingman or behind the net
- remember to get back to the shape of 1-3-1 and get the puck back to the Quarterback/Mid-High area of the offensive zone asap
Fourth Diagram - Ice Area Names - Reminder
- A reminder of the fact that the names are really about areas of the ice.
- If you are in the high-mid area of the Offensive Zone, you are in the 'Quarterback' position and take on that responsibility