Pee Wee / U12 Half Ice Practice Plan #2
Pee Wee / U12 Half Ice Practice Plan #2

The outline for this practice is as follows:
- Peanut Overspeed Skating (7 minutes)
- Half-Ice Shoot in Stride (5 minutes)
- Half-Ice Open Up Shooting (5 minutes)
- Danger Zone 1 on 1 (10 minutes)
- Quick Turn Up 1 on 1 (10 minutes)
- Gretzky 3 on 3 (15 minutes)
Practice Layout
Peanut Overspeed Skating Drill (Half Ice)
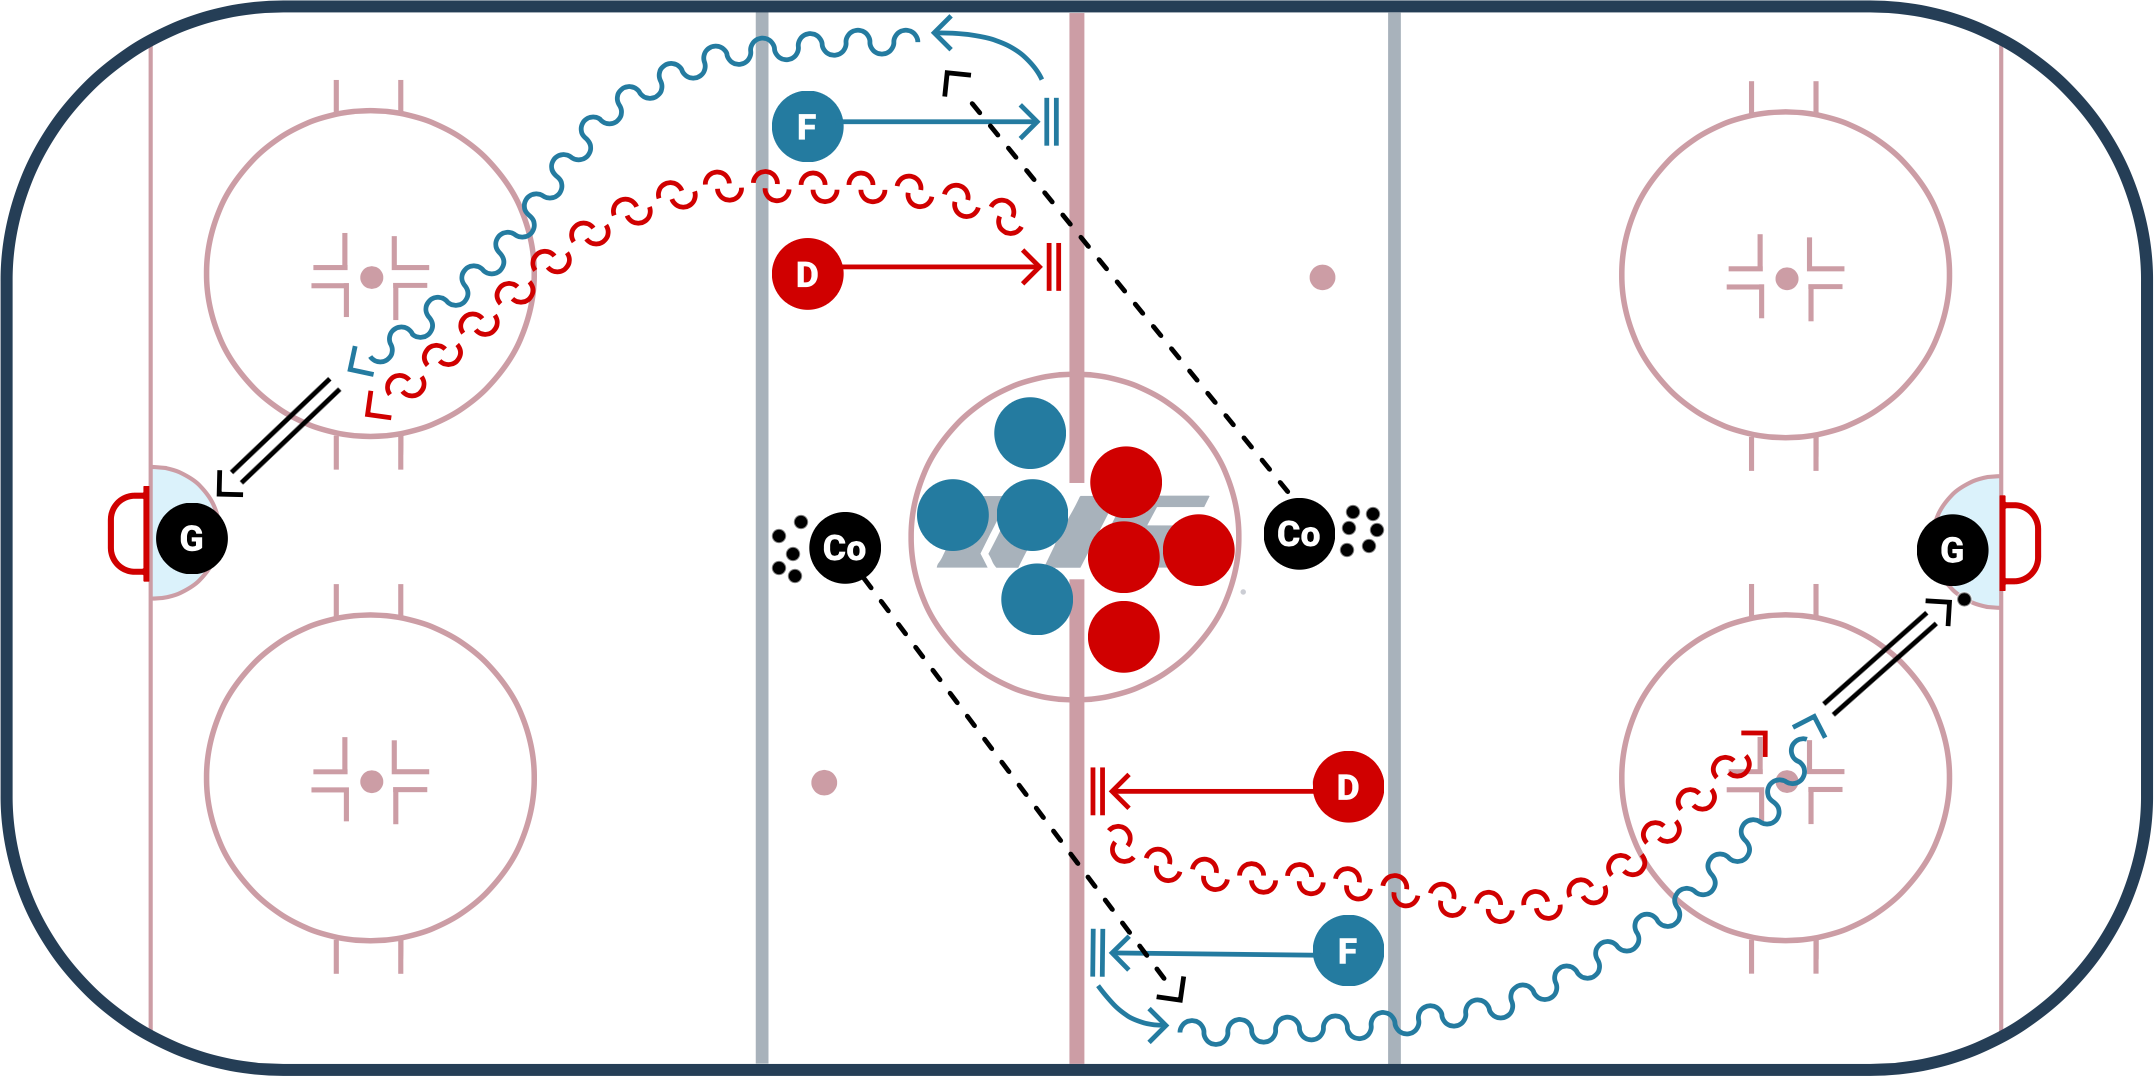
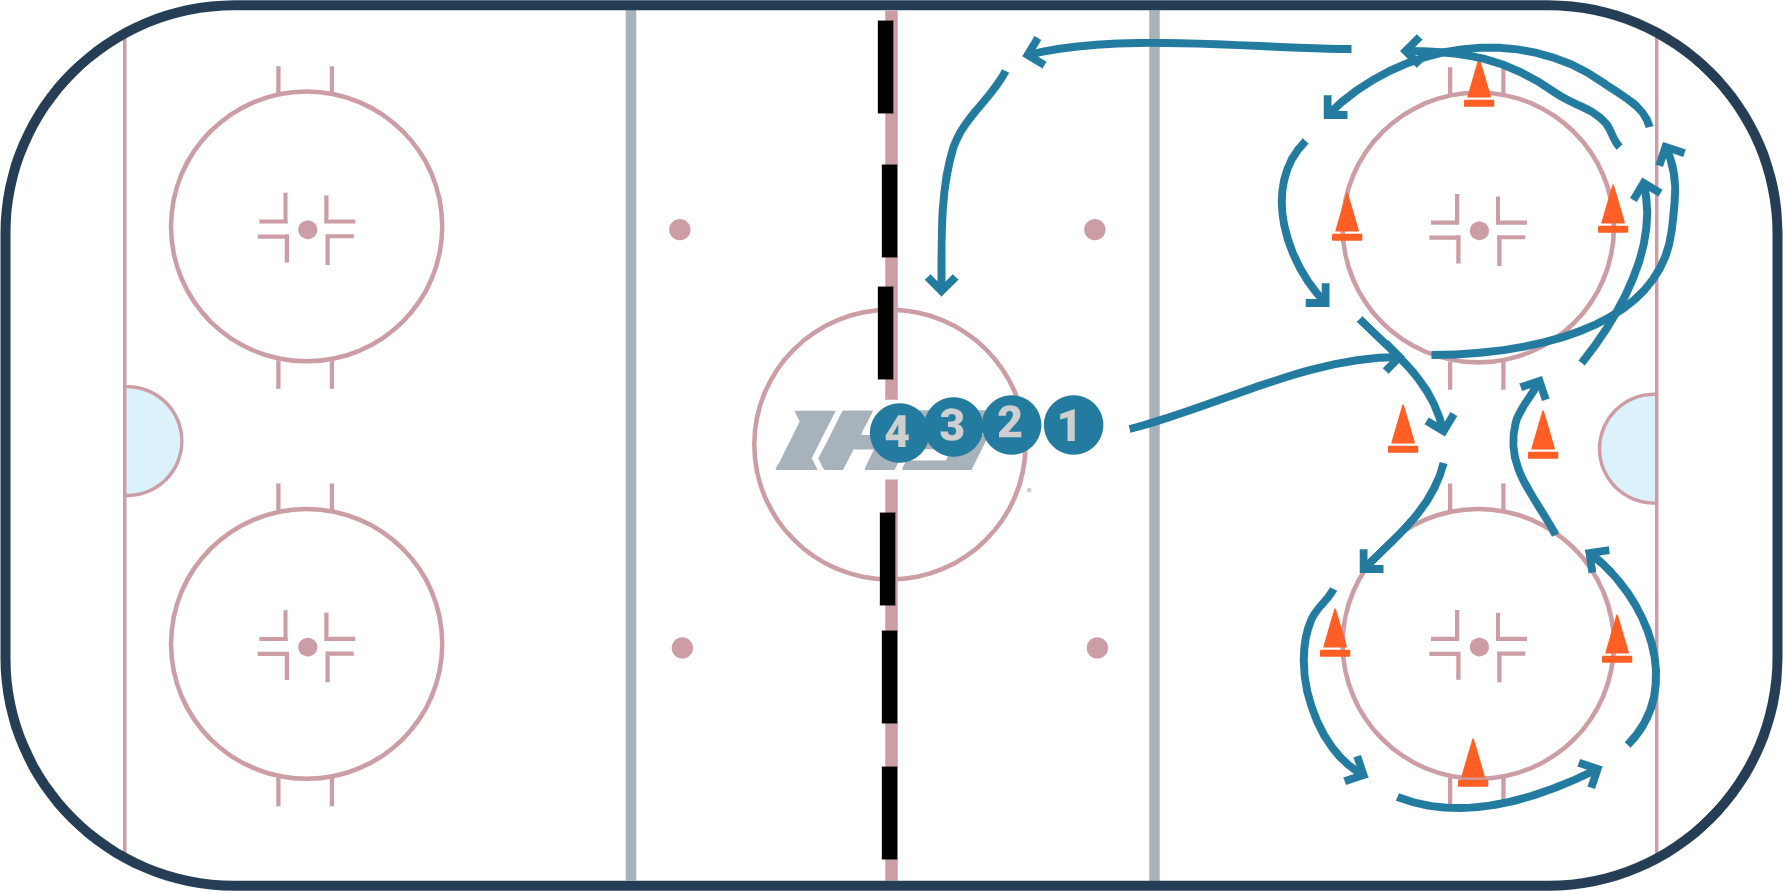
This is a half ice skating drill that is great for most age levels. It emphasizes quick feet and quick changes of direction. To set up the drill have the players line up in the middle of the ice on the blue line facing the net. The players will go in groups of two or three. The players skate to the bottom of the circle and around the circle back to the middle and to the inside of the cone then back outside around the top of the next circle. See the diagram and animation for clarity. Switch directions each time.
Coaching Points
- Players should never stop moving their feet.
- Make sure players are skating hard all the way through the blue line.
- When skating around the circle player should stay low and get a strong push from the cross-under.
- Rotate the chest towards the middle of the circle.
Progression
Half Ice Shoot In Stride
This is a great drill to practice the concept of shooting in stride. It is a simple half ice drill so players can focus on shooting in stride without anything else to distract them.
Setup
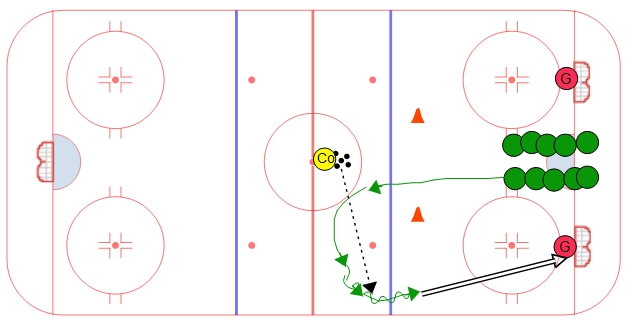
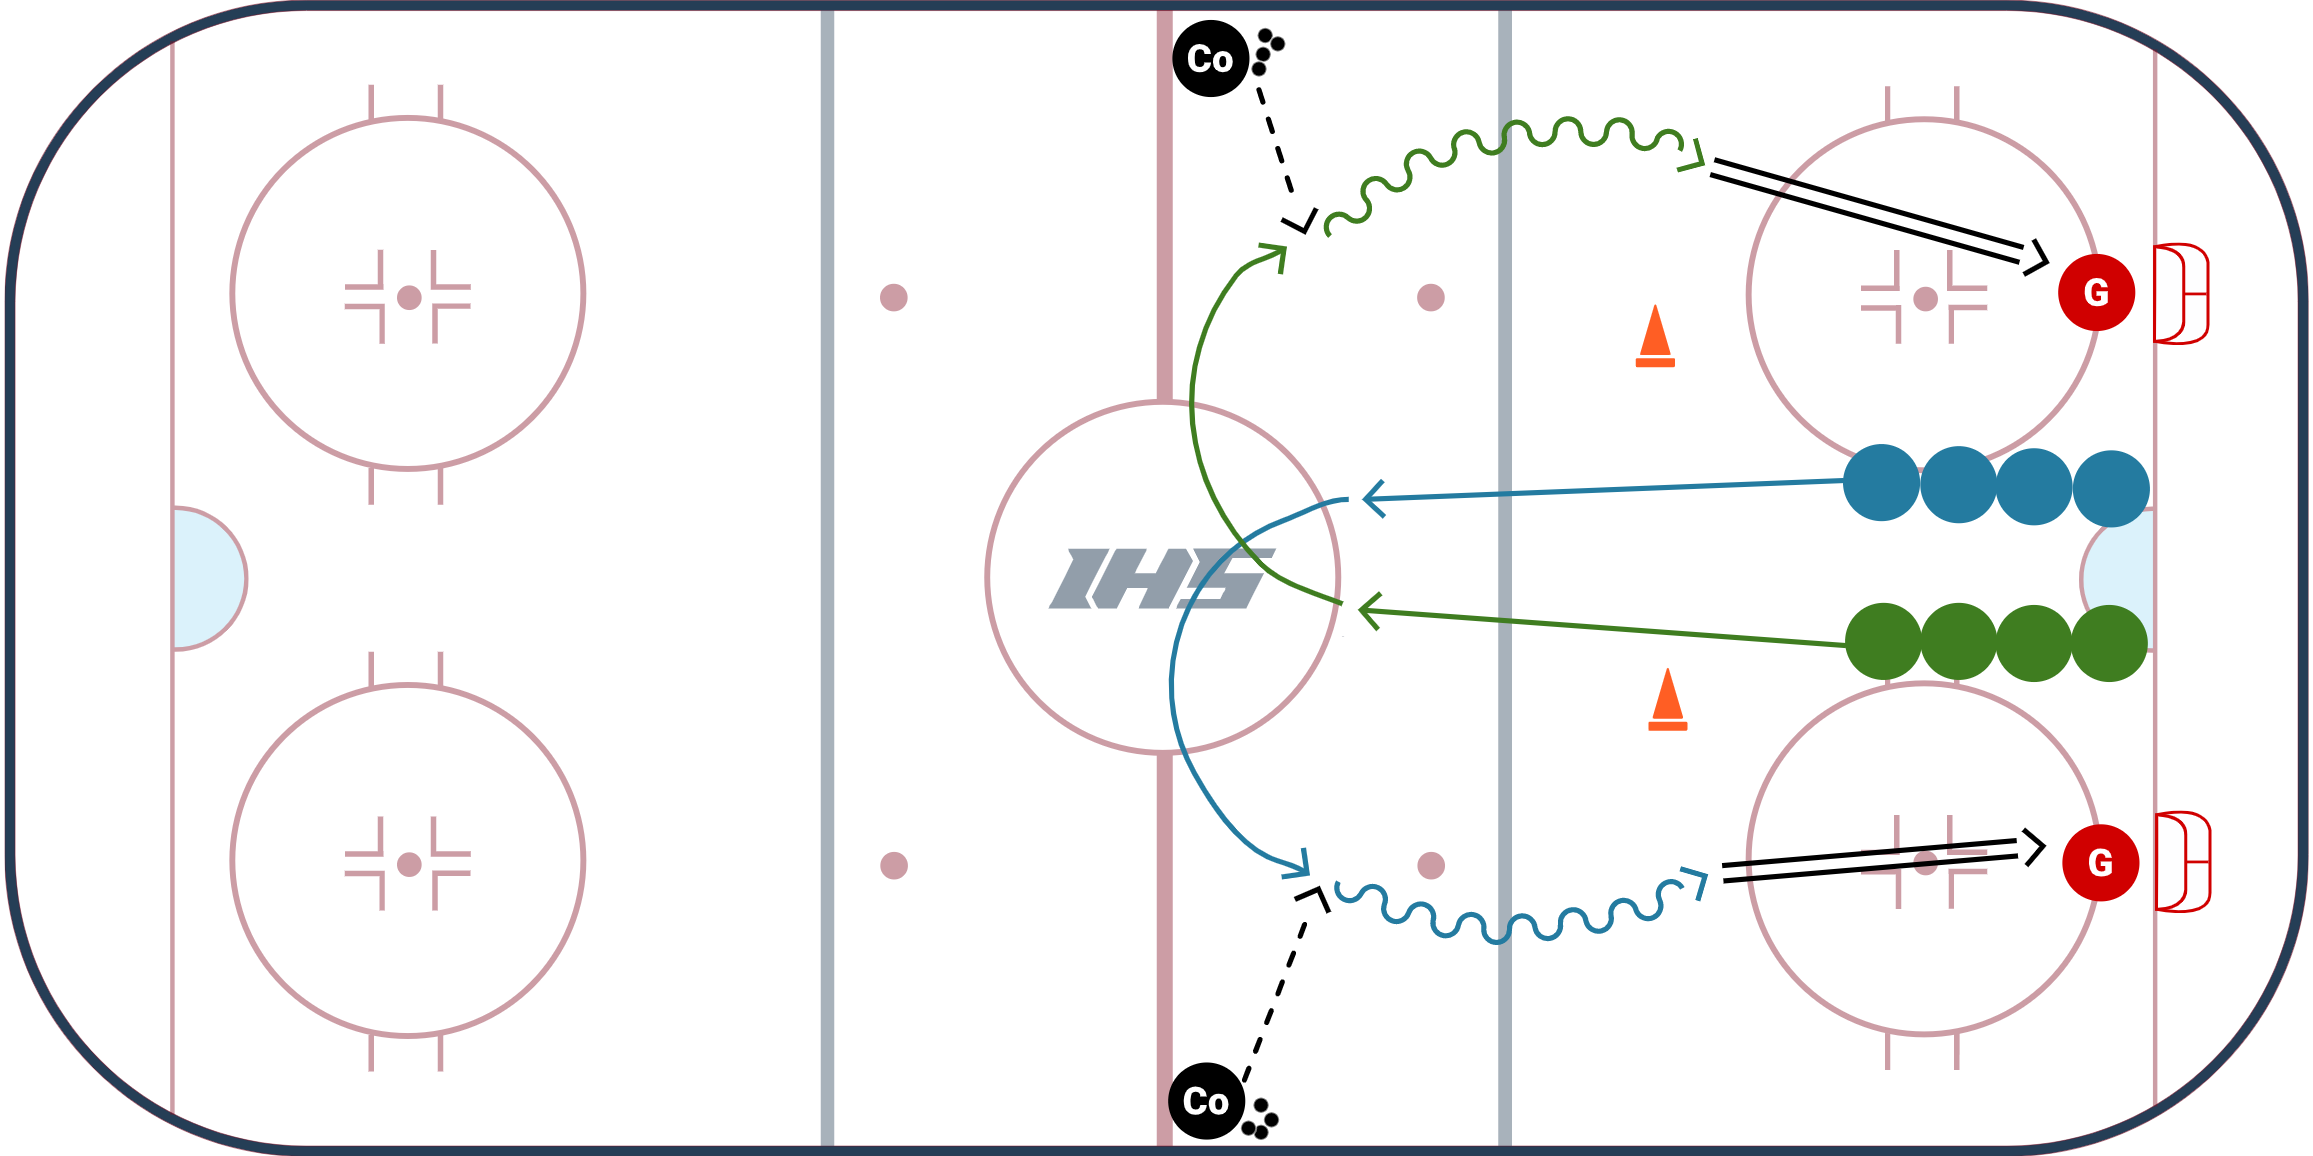
- Players form two lines at the hash marks as shown. The first player skates out to the red line and towards the opposite coach (or player) and calls for a puck. Their feet are moving the entire time.
- Players need to receive the pass and shoot in stride before the cone. It appears to be an easy drill but it is challenging if players are forced to keep their feet moving and shoot before the cone.
Coaching Points
- Communicate! Encourage verbal communication (calling for the puck) and non-verbal communication (player should have their stick on the ice showing where they want the pass).
- Shooting tips: Shoot while your feet are moving so you surprise the goalie.
- Stopping at the net for a rebound.
Half Ice Open Up Shooting
Players form two lines on the inside hash marks as shown in the diagram. On the whistle both players go at the same time. Players feet should touch the red line as they skate towards the wall. As they skate towards the wall they need to open up their hips and call for the puck. Once they recieve the puck they kee their feet moving and shoot in stride.
Danger Zone 1 on 1
Welcome to the Danger Zone!
This one on one drill focuses on an area of the ice where a lot of turnovers occur. Being able to transition quickly will help generate scoring chances. This drill sets players up in a situation where the sole purpose is to have them keep moving their feet as they enter the zone, fighting through the check if they have to.
Setup
- This can be set up as a full ice (as shown in the video), or half ice on both sides, or as a station drill.
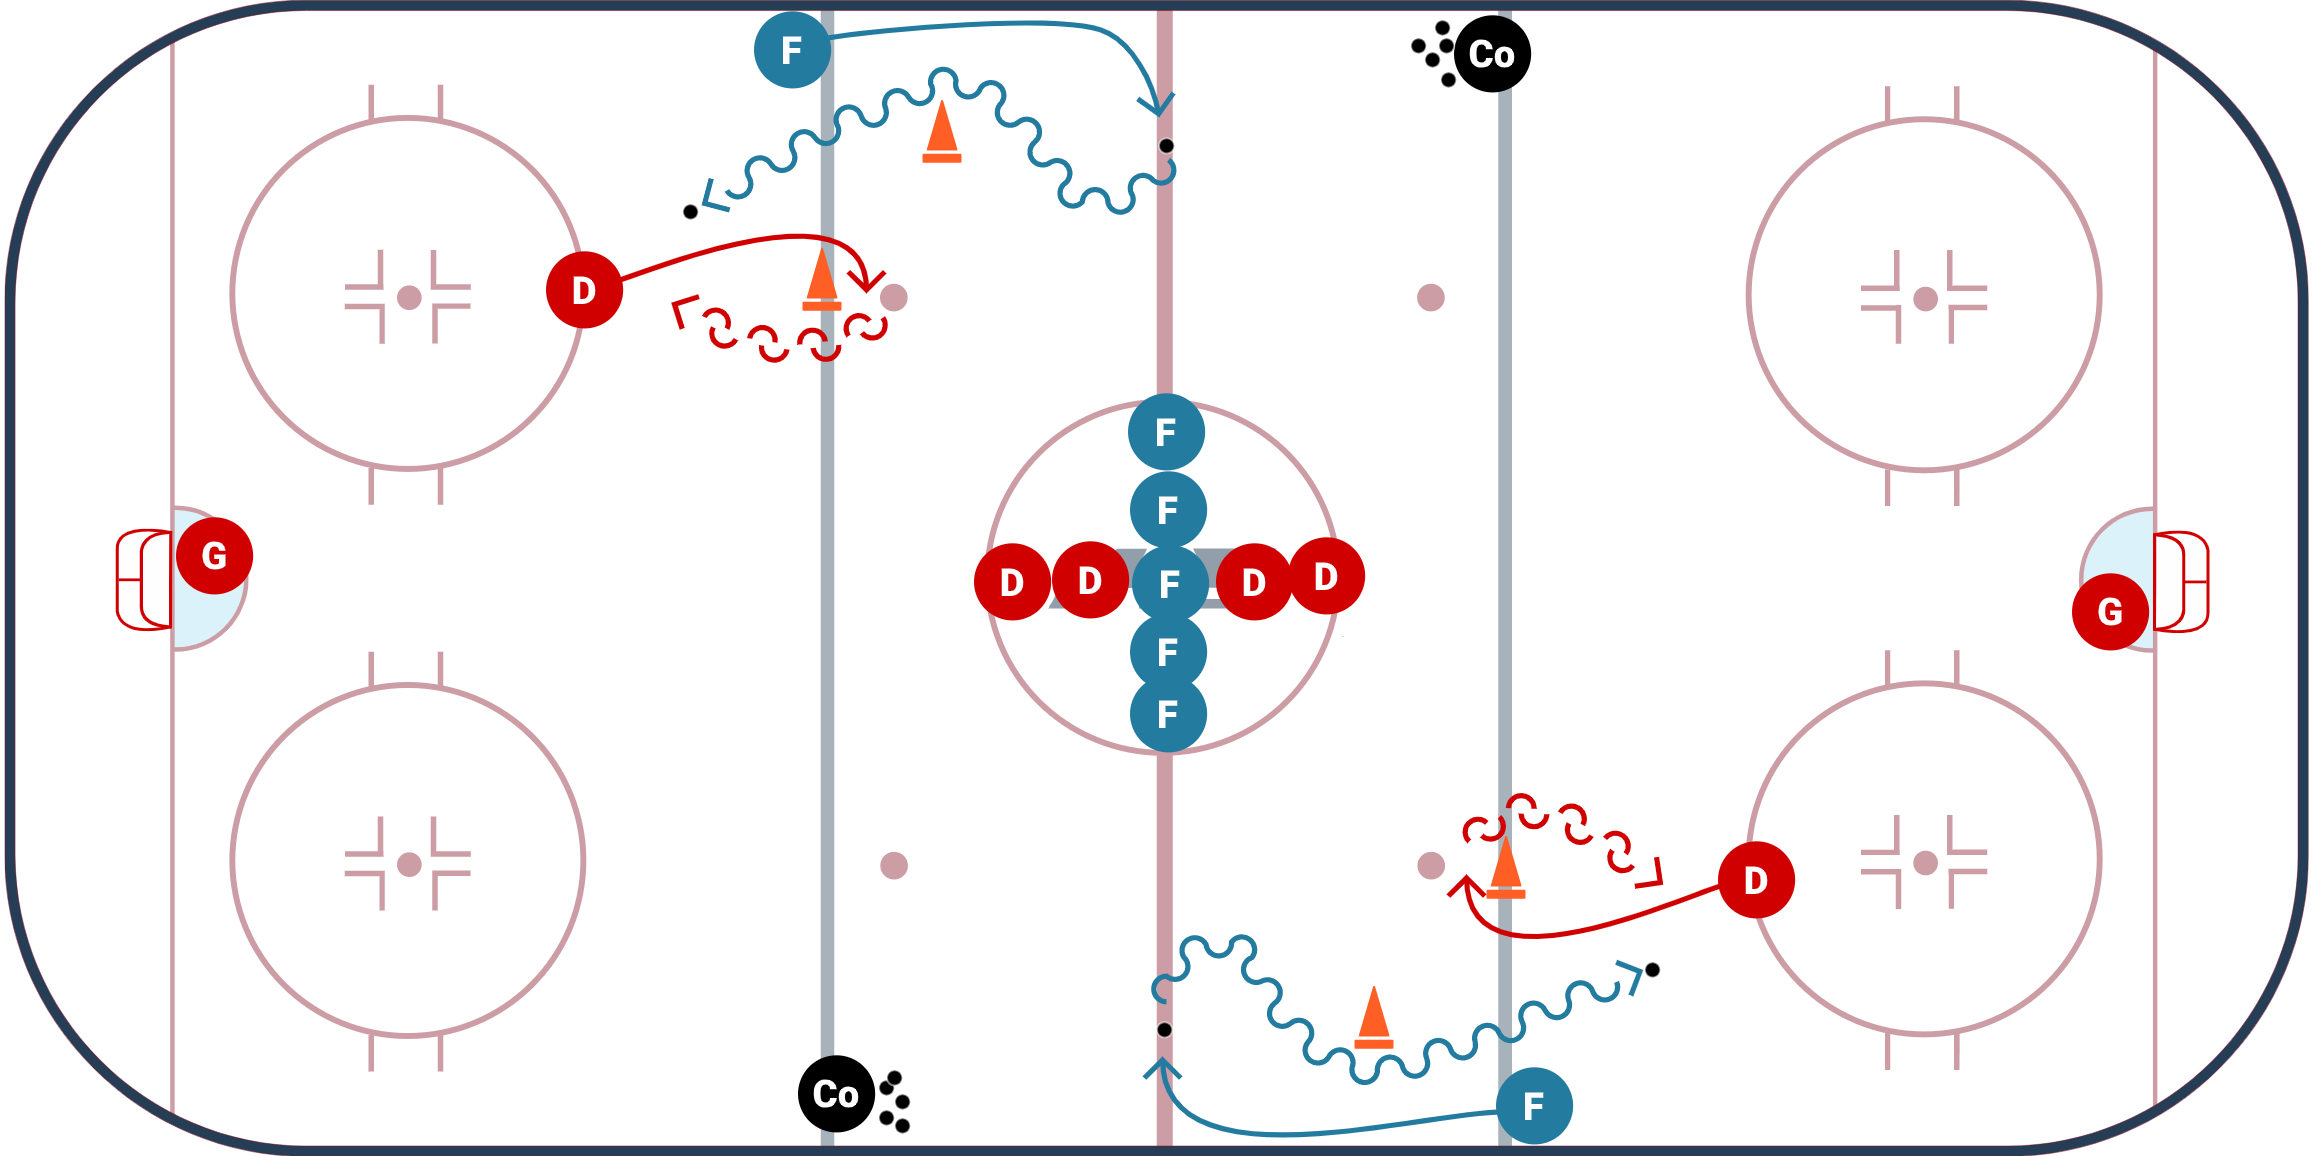
- The drill is set up with the pucks and coaches in the middle of the ice at about the edge of the center face-off circle with pucks. The extra players are inside the center circle out of the way. The forward starts on the blue line along the wall and the defense start on the blue line just inside the dots.
- On the whistle, both players skate up to the red line and stop. The forward calls to receive a pass from the coach (or another player) and the defense transitions backwards... then the danger zone starts!
- Variation: If the defense is getting beat too often, you can have them stop or pivot backwards in between the blue line & center line, which will give them a bit of a head start on the forwards.
Forward Options
- Outside Option: The first is to use their speed and gain the zone to the outside. If the defense is able to play them at the blue line then they can give themselves a soft chip inside the zone and keep their feet moving through the check.
- Middle of Ice Option: If the defense does not do a good job at the blue line and allows the forward to enter the zone with space then the forward can cut to the middle of the ice. It is important that the forwards get the puck down deep into the zone in this situation.
- Get Creative! Anything goes! Change up your skating speed and tempo, use deceptive moves with your body and puck control to get the defenceman off balance, etc. Have fun and work to survive the danger zone!
Defense Coaching Points
- Try and match the speed of the attacker and keep stick on ice.
- Keep your eyes focused on the chest, not the puck so you can play and angle the body.
- The defense should take away as much space as possible and pressure the forward at or before the blue line.
- Do not get stuck by crossing over to many times. If you cross over too many times and start to move lateral, it gives the forward an option to get you off balance and skate the other way. Watch the video demo below "Backwards Crossover Start" for tips to immediately gain speed and not lose your balance.
- Try to go blade on the blade while finishing with your body.
This 1 on 1 drill is for a very specific part of the ice. More 1 on 1 situational drills can be viewed on our 1 on 1 hockey drills page.
Quick Turn Up 1 on 1
This one on one drill has the defense start on the top of the circle and the forward start along the wall on the blue line. The inactive forwards and defense should all line up in the center circle. Place cones as shown to mark where players need to skate around. A puck is place on the red line by the coach. On the whistle the forward will skate up the red line, retrieve the puck, and make a tight turn to attack the defense. They need to skate wide around the cone (as shown) and then attack the defense as the enter the zone wide. The defense will skate up and transistion towards the inside of the ice and then take on the forward in a one on one.
The key for the defense is to use the dots as a guide and make sure the forward stays to the outside using a good gap and good stick positition. They should try to force the forward into a bad angle shot and if they try to go to the inside they should be ready with good body position or stick.
Forwards should take what the defense gives them. If they give them too much space then take the inside. If the defense does not give them the middle then they should protect the puck and drive wide.
Gretzky 3 on 3
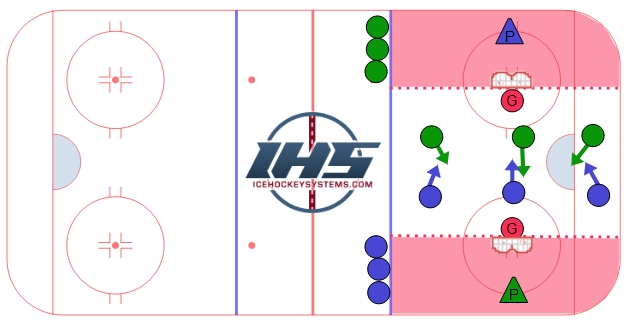
This is a 3 on 3 cross ice game where players can take advantage of a "Gretzky" behind the opponents net. The "Gretzky" has to stay behind the goal line and makes passes to players on their team from behind the net.
- On a change of possession players have to make 1 pass to their "Gretzky" before attempting to score.
- Player can go below the goal line to challenge the other team's "Gretzky" and attempt to steal the puck.
- Players can go below the goal line to support their own "Gretzky".
- There is no limit to how many times players can use their "Gretzky".
- On the whistle players leave the puck and skate hard out of the zone and new players enter the game.
- Let each shift run about 30 - 40 seconds to keep the game fast paced and high intensity.
