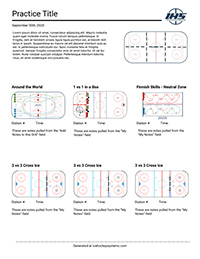
1 v 1 Stations
1 v 1 Stations

Please Note: The Practice of the Week is designed to bring value across multiple age levels. You can use this to build ideas to develop your own practice. With that being said, we highly encourage you to adjust the drills based on your team's age and skill levels. IHS should always be used as a starting point and you can add/remove constraints to fit your team.
ALSO NOTE: This is too many drills for one practice. Take the ones you like and adjust for your team and time constraints.
Practice Theme: The drills and games in this practice are designed to help your players work on 1 on 1's in various situations.
3 Key Focus Points
Offense:
- Head up - see where the open ice is and what the defenders position is
- Protect the puck - use your body and low center of gravity to keep the defender from the puck
- Use deception - use false information from your eyes, head, body, and feet to create space & separation from the defender
Defense:
- Eyes - keep your eyes focused on the players chest, not the puck.
- Stick on the ice - use short stabs and not a sweeping motion to achieve stick on puck.
- Positioning - utilize good angles & gaps.
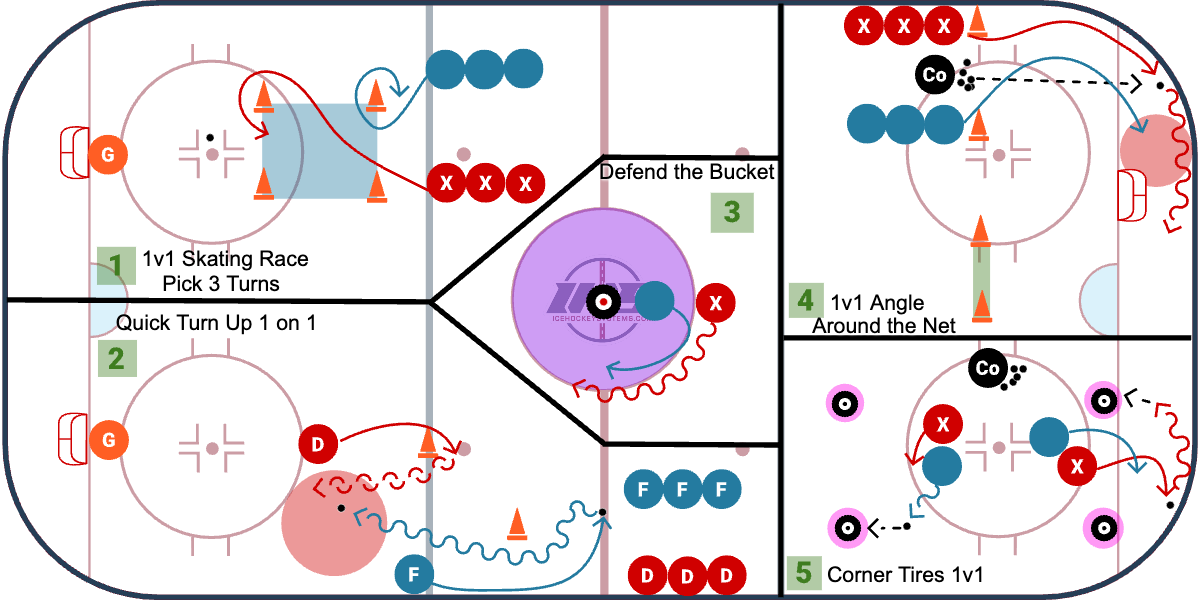
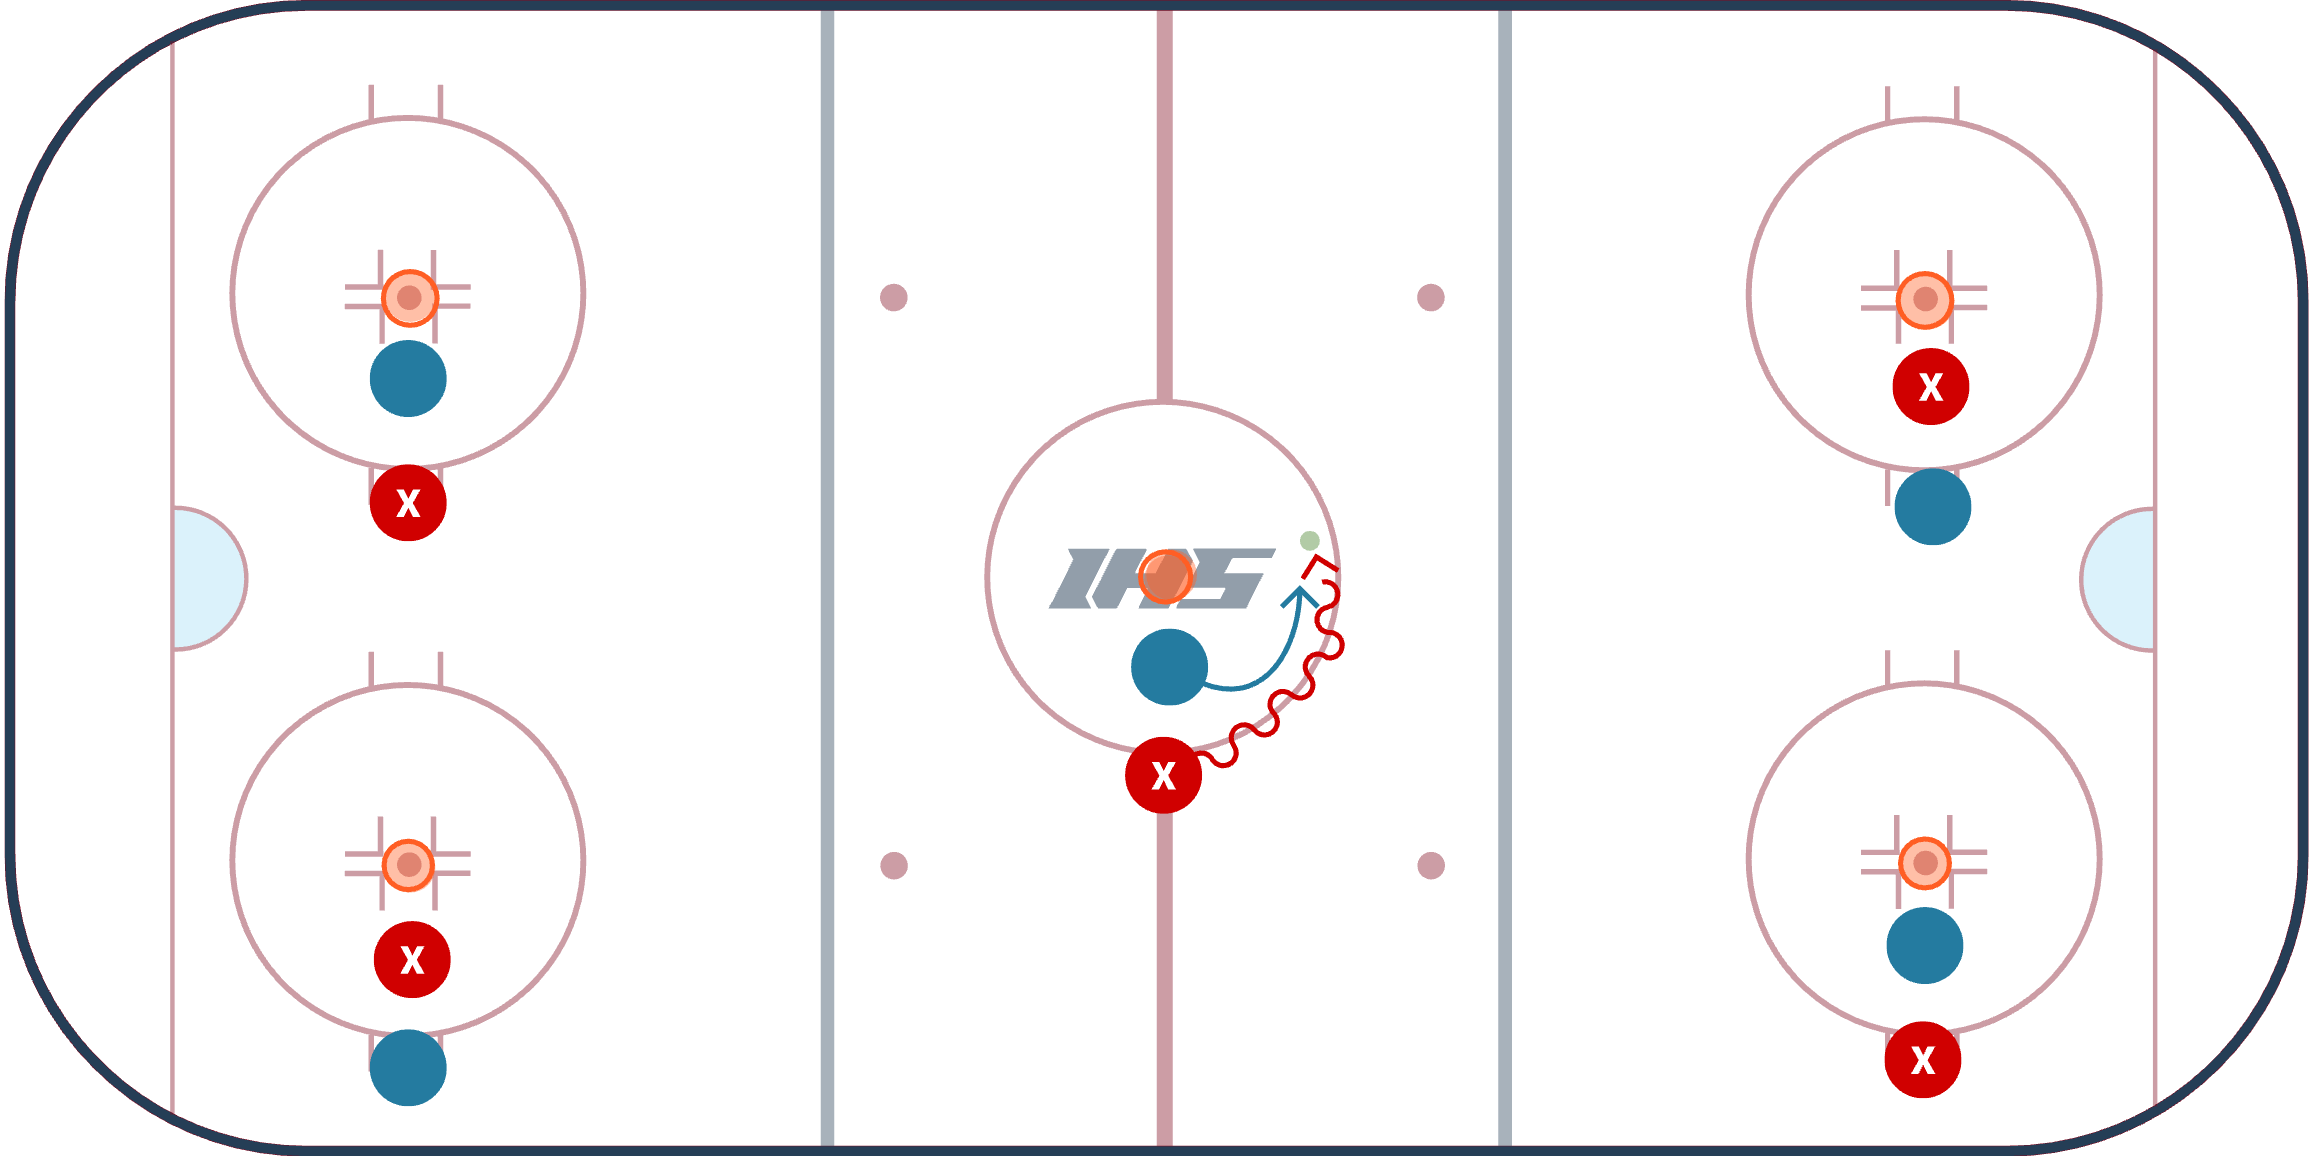
3 Speed Warm-Up Drill
A warm-up drill that can be performed in any zone with the entire team. Coaches can customize this warm-up activity with different skills based on the age and ability level of the team.
Setup
- Each player has a puck.
- Whistle # 1 - players skate at 50% speed and their feet do not leave the ice.
- Skates are in the ice at all times and players move by driving their weight off of their inside edges. Players stickhandle the puck side to side with wide lateral movements as they shift their weight looking for open ice.
- Whistle # 2 - players skate at 75% speed and their feet can leave the ice.
- Be creative! Players can pick their feet up from the ice and they are moving at about 75% while being creative with tight control turns, sharp lateral movements, and still looking for open ice.
- Whistle # 3 - players skate at 100% speed.
- Be explosive and move their feet outside of your comfort zone. Jump to open areas of ice. Goalies skate backwards.
Coaching Points
- Players must keep head up and look for open ice during all 3 speeds.
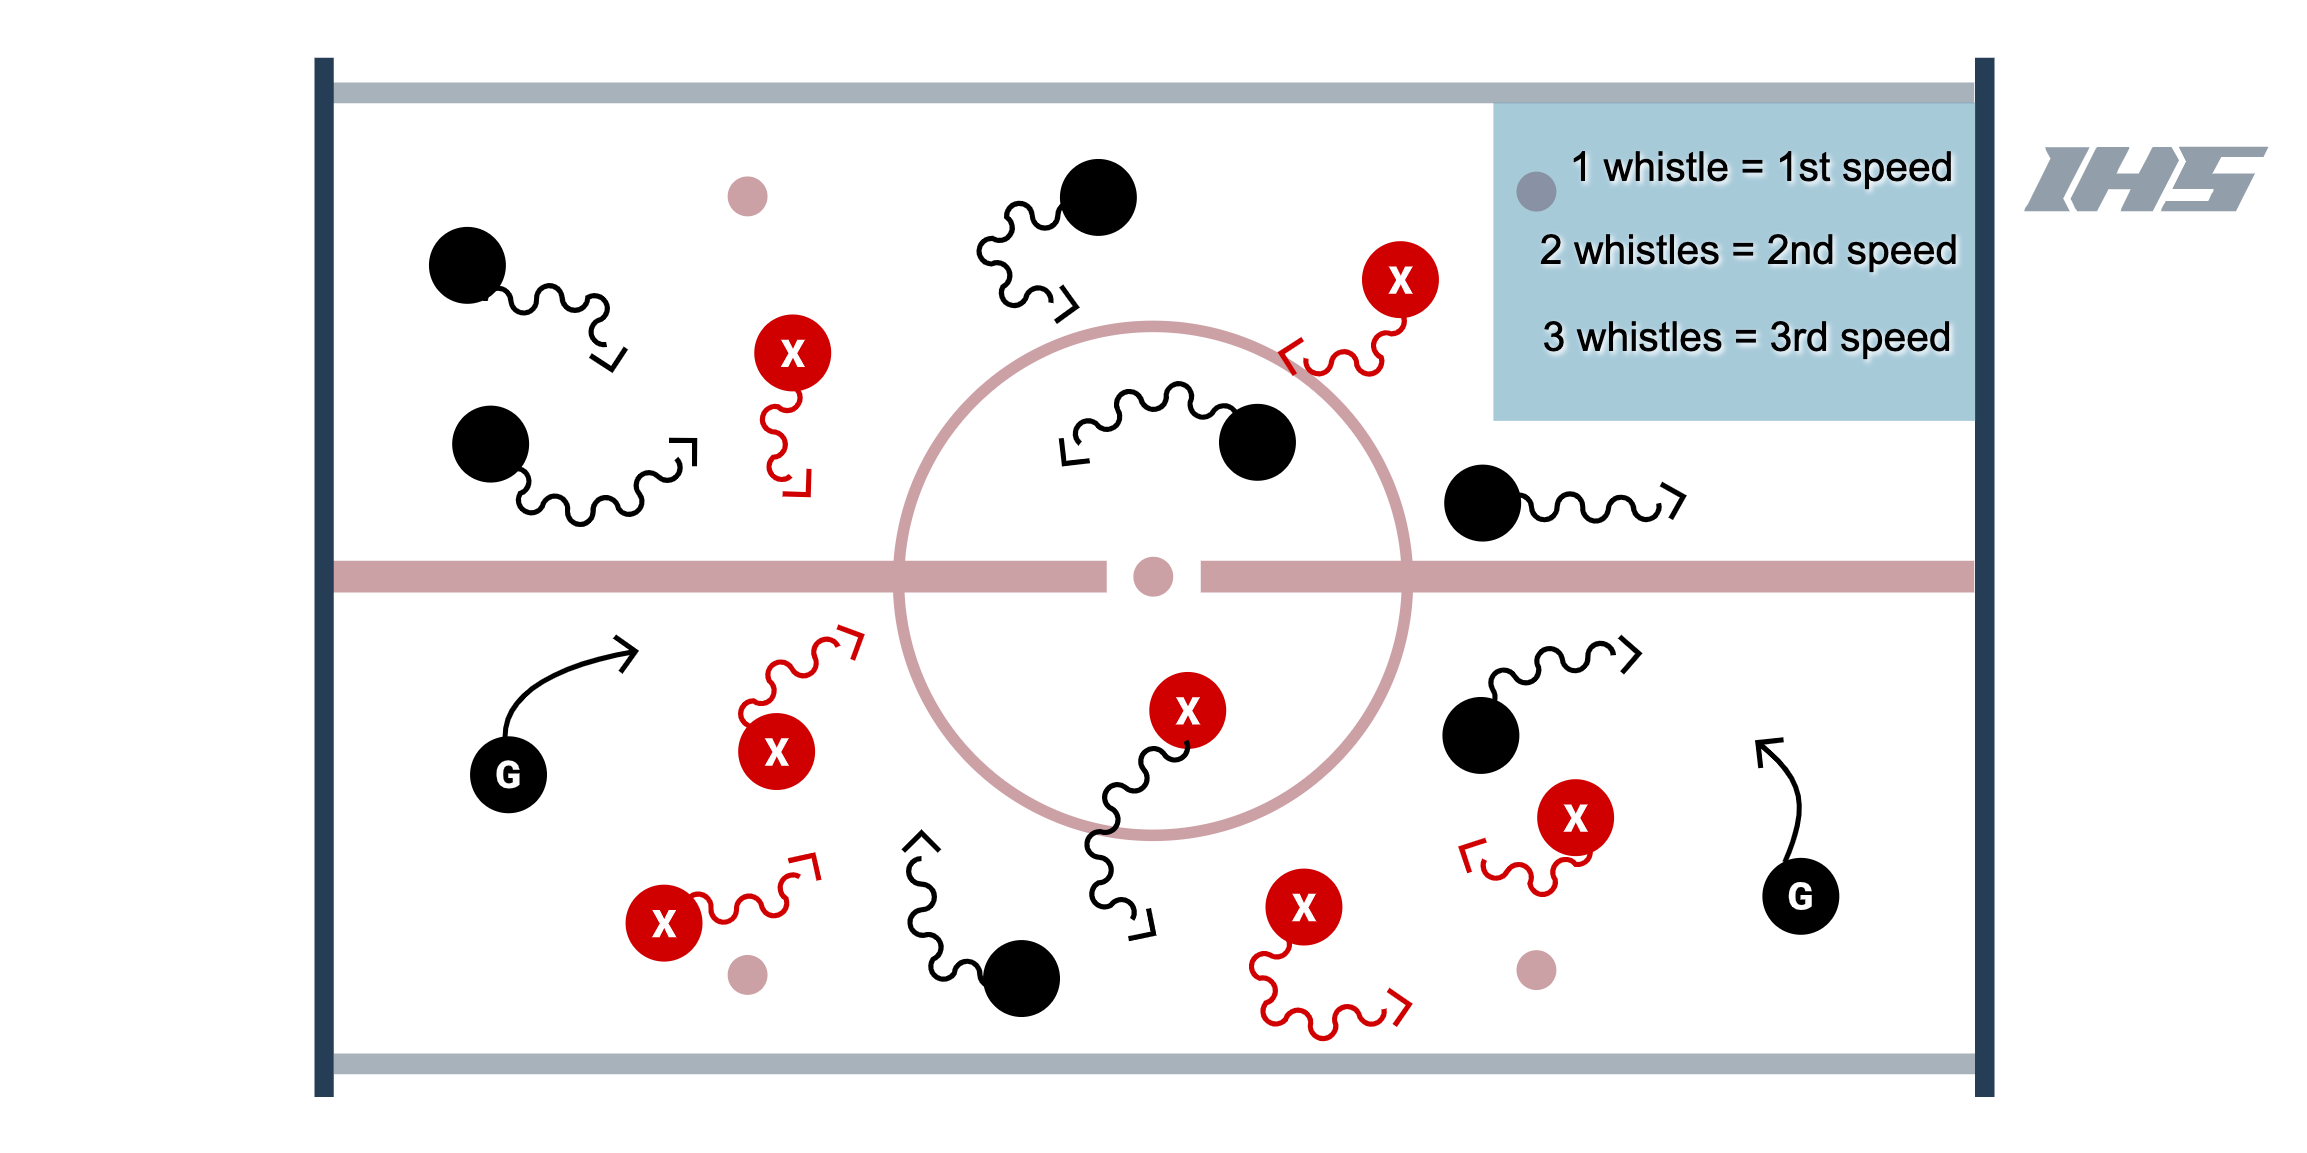
Layered 1 v 1's
Layered 1v1s
- Drill starts with the Forward slightly outside of the zone. Two Defense (D1 & D2) are positioned in the zone with imaginary lines for their respective areas. D1's zone is between the top of the circle to the blue line. D2's zone from the goal line to the top of the circle.
- The objective is for F1 to use heads-up awareness, anticipation, skating, and puck skills to evade both defensemen in their respective "zones" and try to score.
- The D must stay in their respective area to shut down the F, focusing on angling, body and stick positioning and spatial awareness. If F gets past D1 and into the next zone, D1 will let up and stop pressuring. When the F enters the zone for D2, D2 activates to pressure and try to shut down the forward from a scoring chance.
Great for small area stations and skill groups.
Progressions for more players involved: Have 2 Fs start so it becomes layered 2v1s in small/tight areas
Progression for transition or SAG: If F gets a shot on net, 1 pt. If F scores a goal, 2 pts. If either D steals the puck from the F, they must make a successful pass to the other defensemen and then skate it out for a point.
Progression for Continuous: Set up players on both halves of the zone so that each side as 1F, 2D (6 total players). One side starts the drill. If D breaks up the play, they must make a pass to the F on the other side to immediately activate the other side. If the F makes it through both defensemen for a shot, coach puts a new puck in the corner, the 2 D battle the 1 F to gain possession and make the pass to the other side.
Coaching Points
- This drill challenges players to not only think about getting past the first defender, but immediately getting past the second defender in a very tight area.
- After each rep, ask the offensive player what they saw or noticed (i.e. the defenders' stick positioning, defenders' body positioning or where they saw an opening to create a scoring chance).
- Encourage creativity in these small areas - players must think and move quickly.
- Increase or decrease the space of the drill or starting point of each position to change up the challenge for the players.
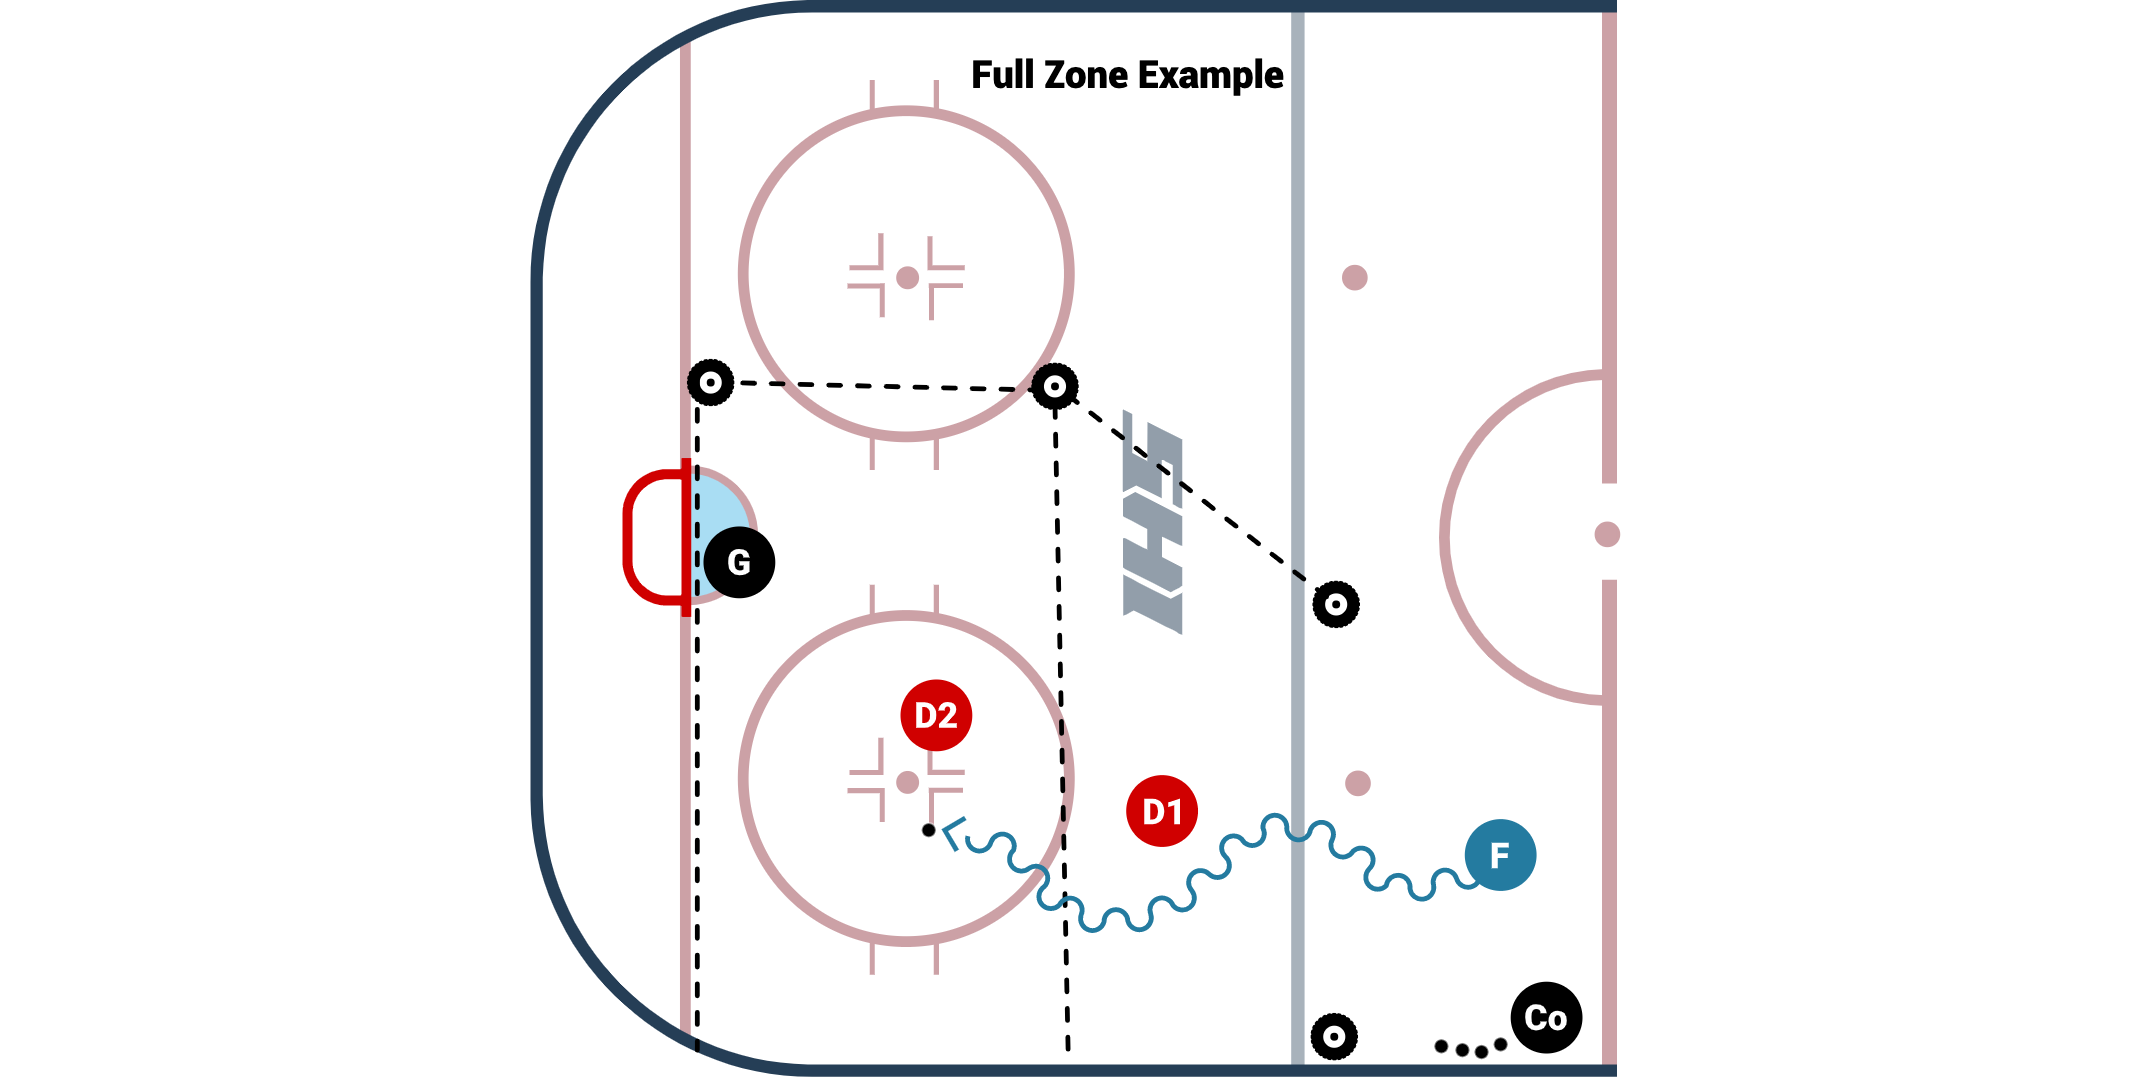
1 v 1 Skating Race - Pick 3 Turns
1 V 1 Skating Race - Pick 3 Turns is a competitve racing drill that helps players practice tight turns.
Setup
- Place 4 cones as shown in the diagram, inside the blue line and above the circle.
- Create 2 lines of players at the blue line.
- On the whistle, 2 players race to the 4 cones and pick 3 random cones to do a tight turn around.
- After the 3rd tight turn, players are allowed to attack the free puck and take a shot on net.
Coaching Points
- Encourage players to get low on their turns and utilize their edges.
- Keep center of gravity low.
- Head learns the turn, so look to where you want to go.
- Keep feet moving right after a tight turn.
Variations
- Coaches can place the cones in different areas of the ice, or make the skating area larger.

Quick Turn Up 1 on 1
This one on one drill has the defense start on the top of the circle and the forward start along the wall on the blue line. The inactive forwards and defense should all line up in the center circle. Place cones as shown to mark where players need to skate around. A puck is place on the red line by the coach. On the whistle the forward will skate up the red line, retrieve the puck, and make a tight turn to attack the defense. They need to skate wide around the cone (as shown) and then attack the defense as the enter the zone wide. The defense will skate up and transistion towards the inside of the ice and then take on the forward in a one on one.
The key for the defense is to use the dots as a guide and make sure the forward stays to the outside using a good gap and good stick positition. They should try to force the forward into a bad angle shot and if they try to go to the inside they should be ready with good body position or stick.
Forwards should take what the defense gives them. If they give them too much space then take the inside. If the defense does not give them the middle then they should protect the puck and drive wide.
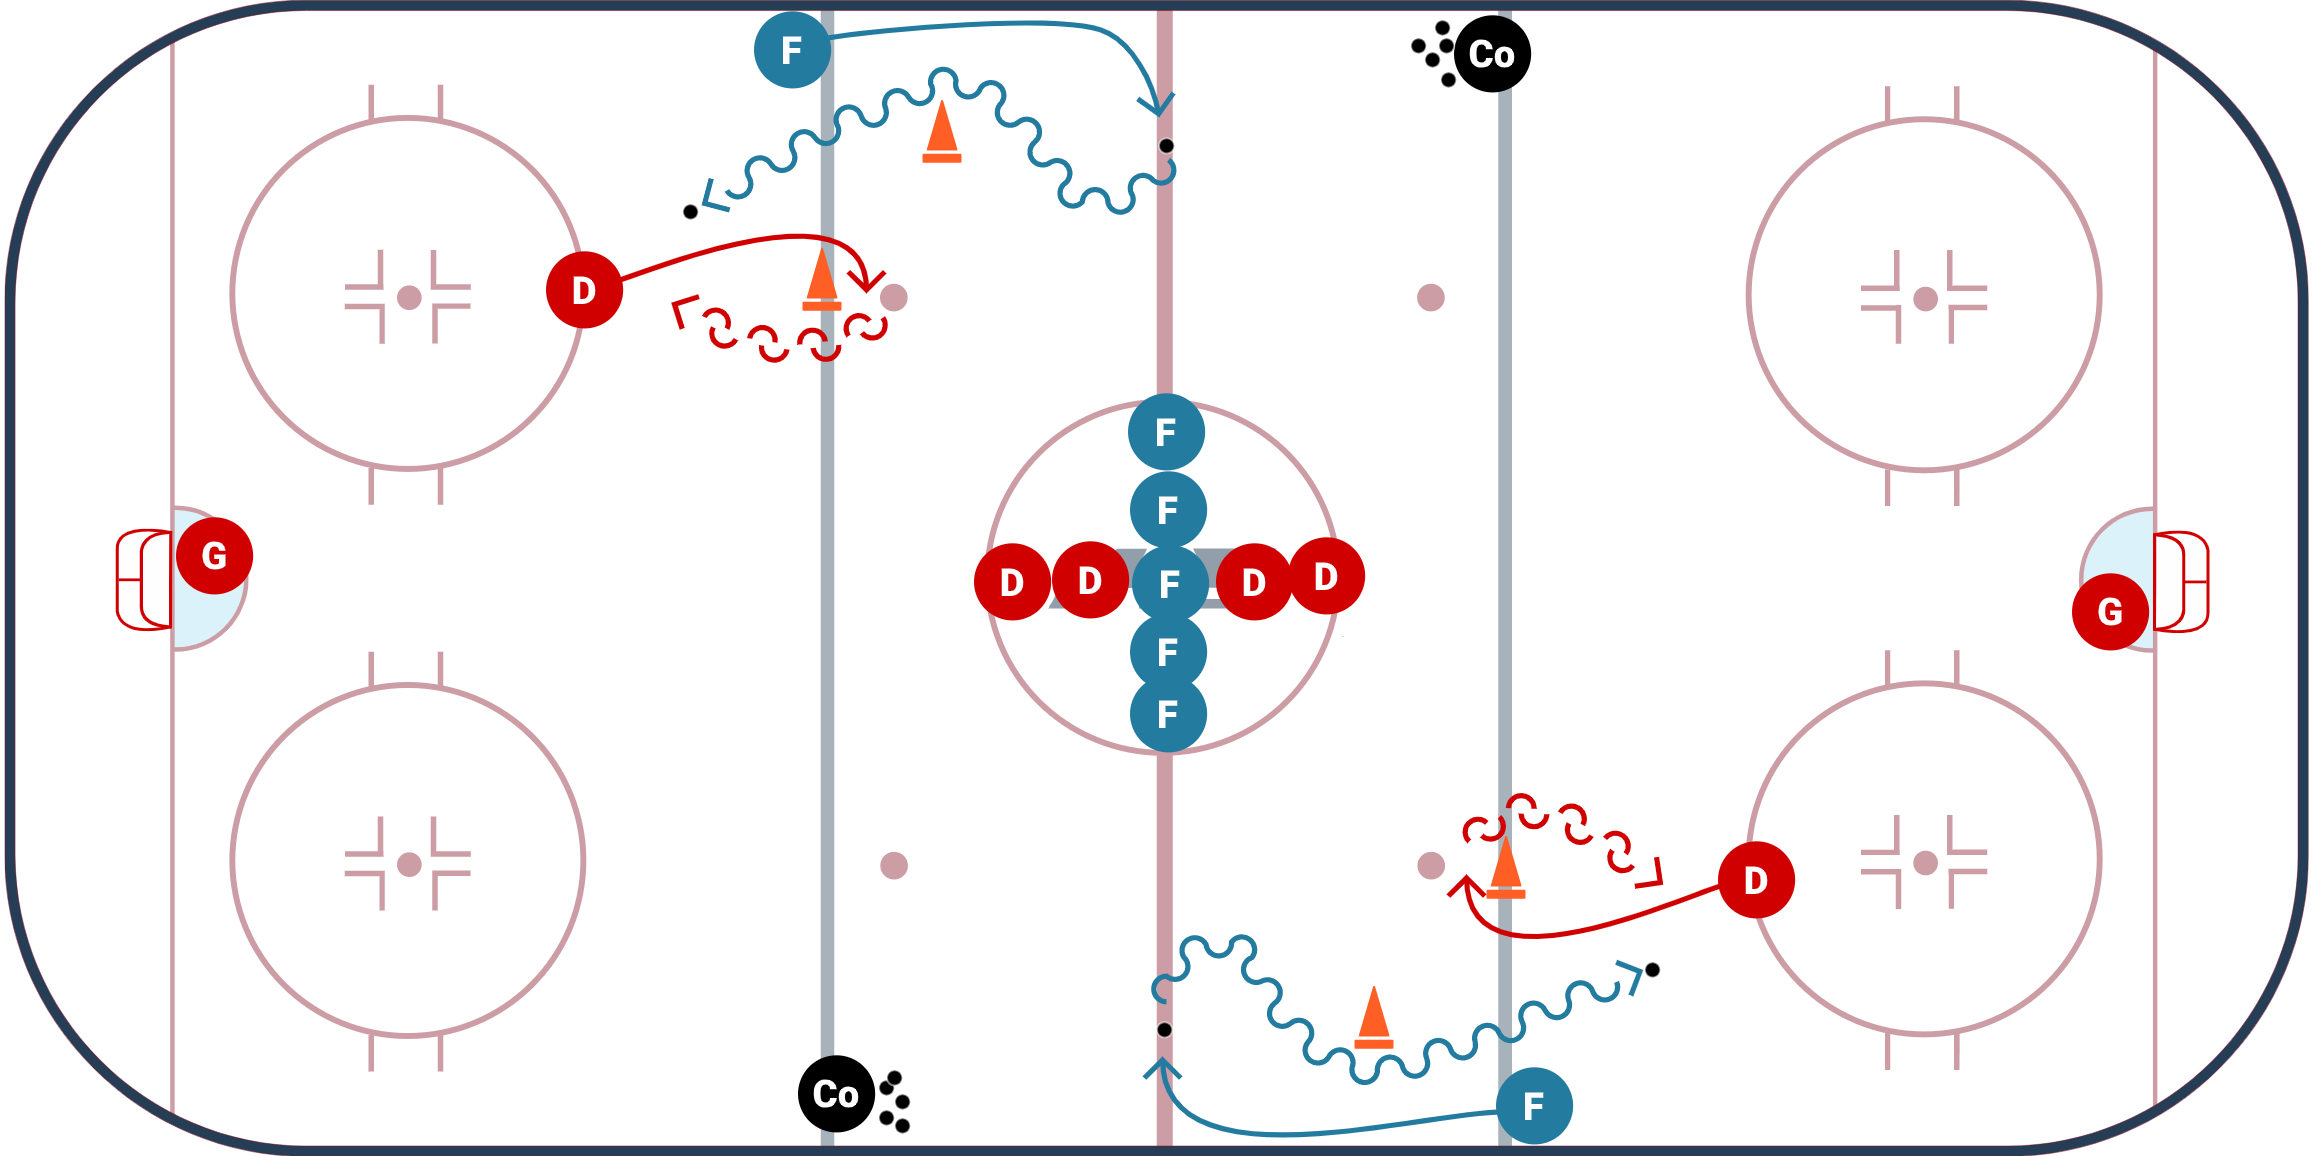
Defend the Bucket
Drill Setup:
- Bucket is in the middle of the circle.
- Bucket represented by the square.
- Players do not have sticks.
- The offensive player (O) starts outside the circle with a puck or some sor tof object in their hand.
- The defensive player (X) starts inside the circle.
- When instructed the offensive player skates around the circle (this avoids the offensive player skating right at the defender). The defender is to shadow and keep the offensive player away from the bucket.
- The offensive player is trying to get around the defender and to the bucket to put their object in the bucket. If able to do so they win a point.
- If the defender is able to defend the bucket for 10 seconds they win a point. The offensive player is not allowed to "bull" over the defender.
- The offensive player can use turns, deceptive footwork and net drive type skills to get to the bucket.
- Remind players this is hockey and NOT football!
Drill Purpose:
- This is meant to be a fun way to work on body contact and defensive footwork.
- It is meant to stress the players ability to have good defensive footwork and positioning and be physical at the right time.
- Outside the physical skills the drill is also meant to start to prove to the players that defense is 90%footwork, and good positioning/angles in 1 v 1 situations.
- This drill can be very difficult and will really highlight bad habits. Due to the small area nature of the drill if the defender makes a mistake they will have difficulty making up for that mistake and bringing that mistake to light (learn from).
- This drill is also meant to be an analogy for players in later drills. The bucket represents the net. Defend the bucket.
Common Mistakes:
- There are many mistakes players make in this drill.
- Again it is a difficult drill that highlights/amplifies all the players little mistakes made. Players who are good at this drill have really good details.
- Mistakes include:
- 1) Being overaggressive
- 2) Crossing feet when changing direction
- 3) Turning their back to offensive player
- 4) Not being ready for offensive player to change direction or throw a fake (anticipate and know offensive players options!)
- 5) Backing up toward bucket and not being aggressive enough to maintain gap and keep player away from bucket.
Progression
- After players get comfortable with this drill, and footwork, coaches can progress by adding a net and a goalie with the 1 v 1 to 2 v 2 (Stick vs No Stick) Drill
This drill is part of the Body Contact & Checking Course from Mark Zarbo Hockey.
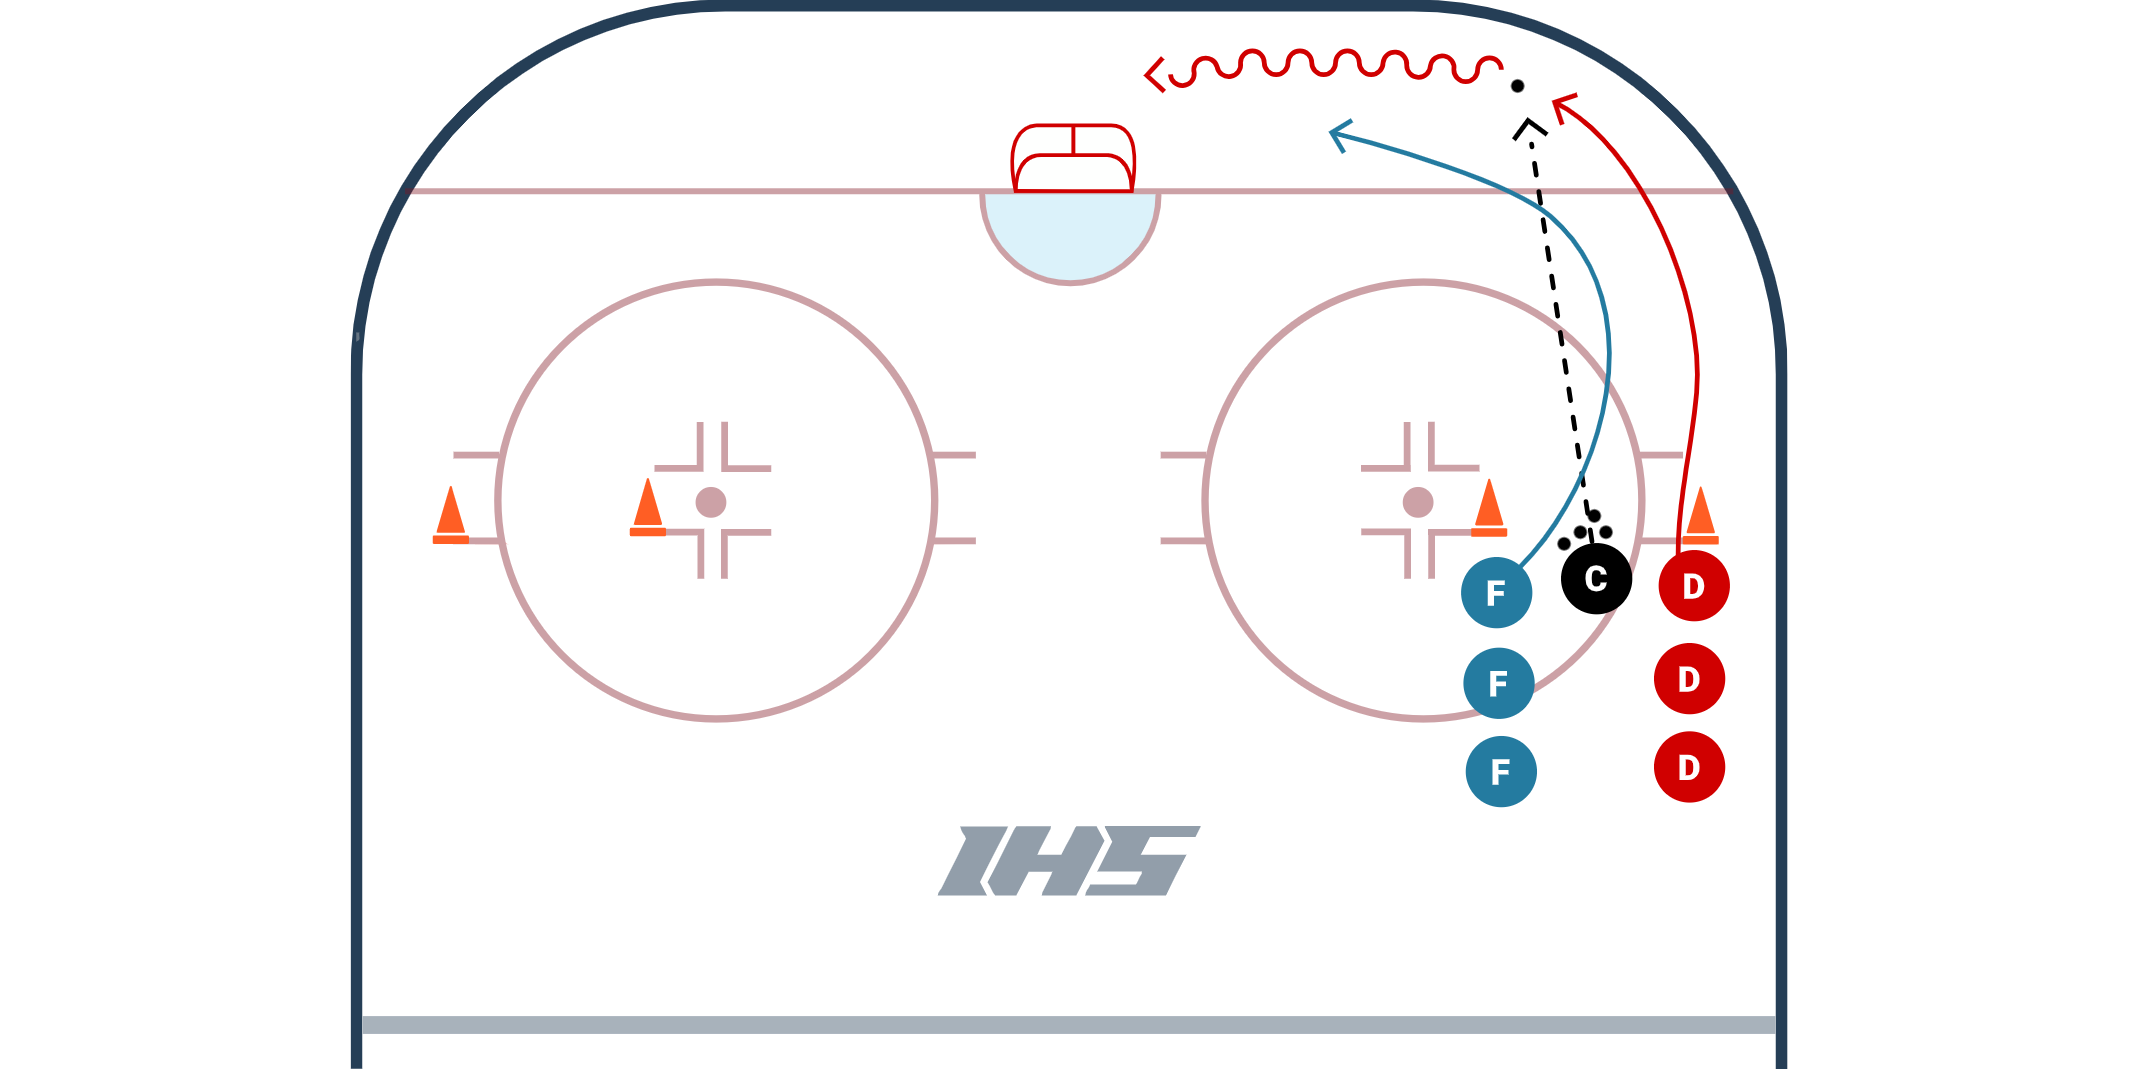
1 v 1 Angle Around The Net Drill
The 1 v 1 Angle Around The Net Drill is an excellent drill to practice forechecking angling for forwards and puck retrievals for defencemen. Forwards and defenceman should get reps at both positions.
Drill Objective: The goal of the game is for the defenceman to collect the puck and skate the puck through the cones. They can go in front of or behind the net. A forward can score a point by stripping the puck from the defenceman and scoring a goal on net. It is a draw if the puck goes out of play. The game starts for the defenseman when the coach chips the puck into the corner. When the coach bangs his stick on the ice, the forechecker starts.
Angling Coaching Points:
- Stick on the ice (to help you angle, intercept a pass, or go stick on stick to take the puck away).
- Match the speed of the player you are chasing.
- Take a proper angle (as pictured in the diagram) so the player can not easily turn back up ice.
Puck Retrieval Coaching Points:
- Look over your shoulder to see where the pressure is
- Retrieve puck at an angle. This will allow you to keep your speed up while you collect the puck.
- Use deception to shake off your forechecker. Use your skates, hips, shoulders, head, or stickhandle maneuvers to make the forechecker think you are doing something else with the puck.
Variations:
- Can be set up as a station, on half-ice, or on a studio rink.
- The coach can give the defenseman a smaller or larger head start.
- Can move the cones to be further away (so there is more skating) or so the goal is larger or smaller to skate through.
- Can add a goalie.
- Can give an extra point to the defenseman for making a pass to a player or coach that is breaking out.
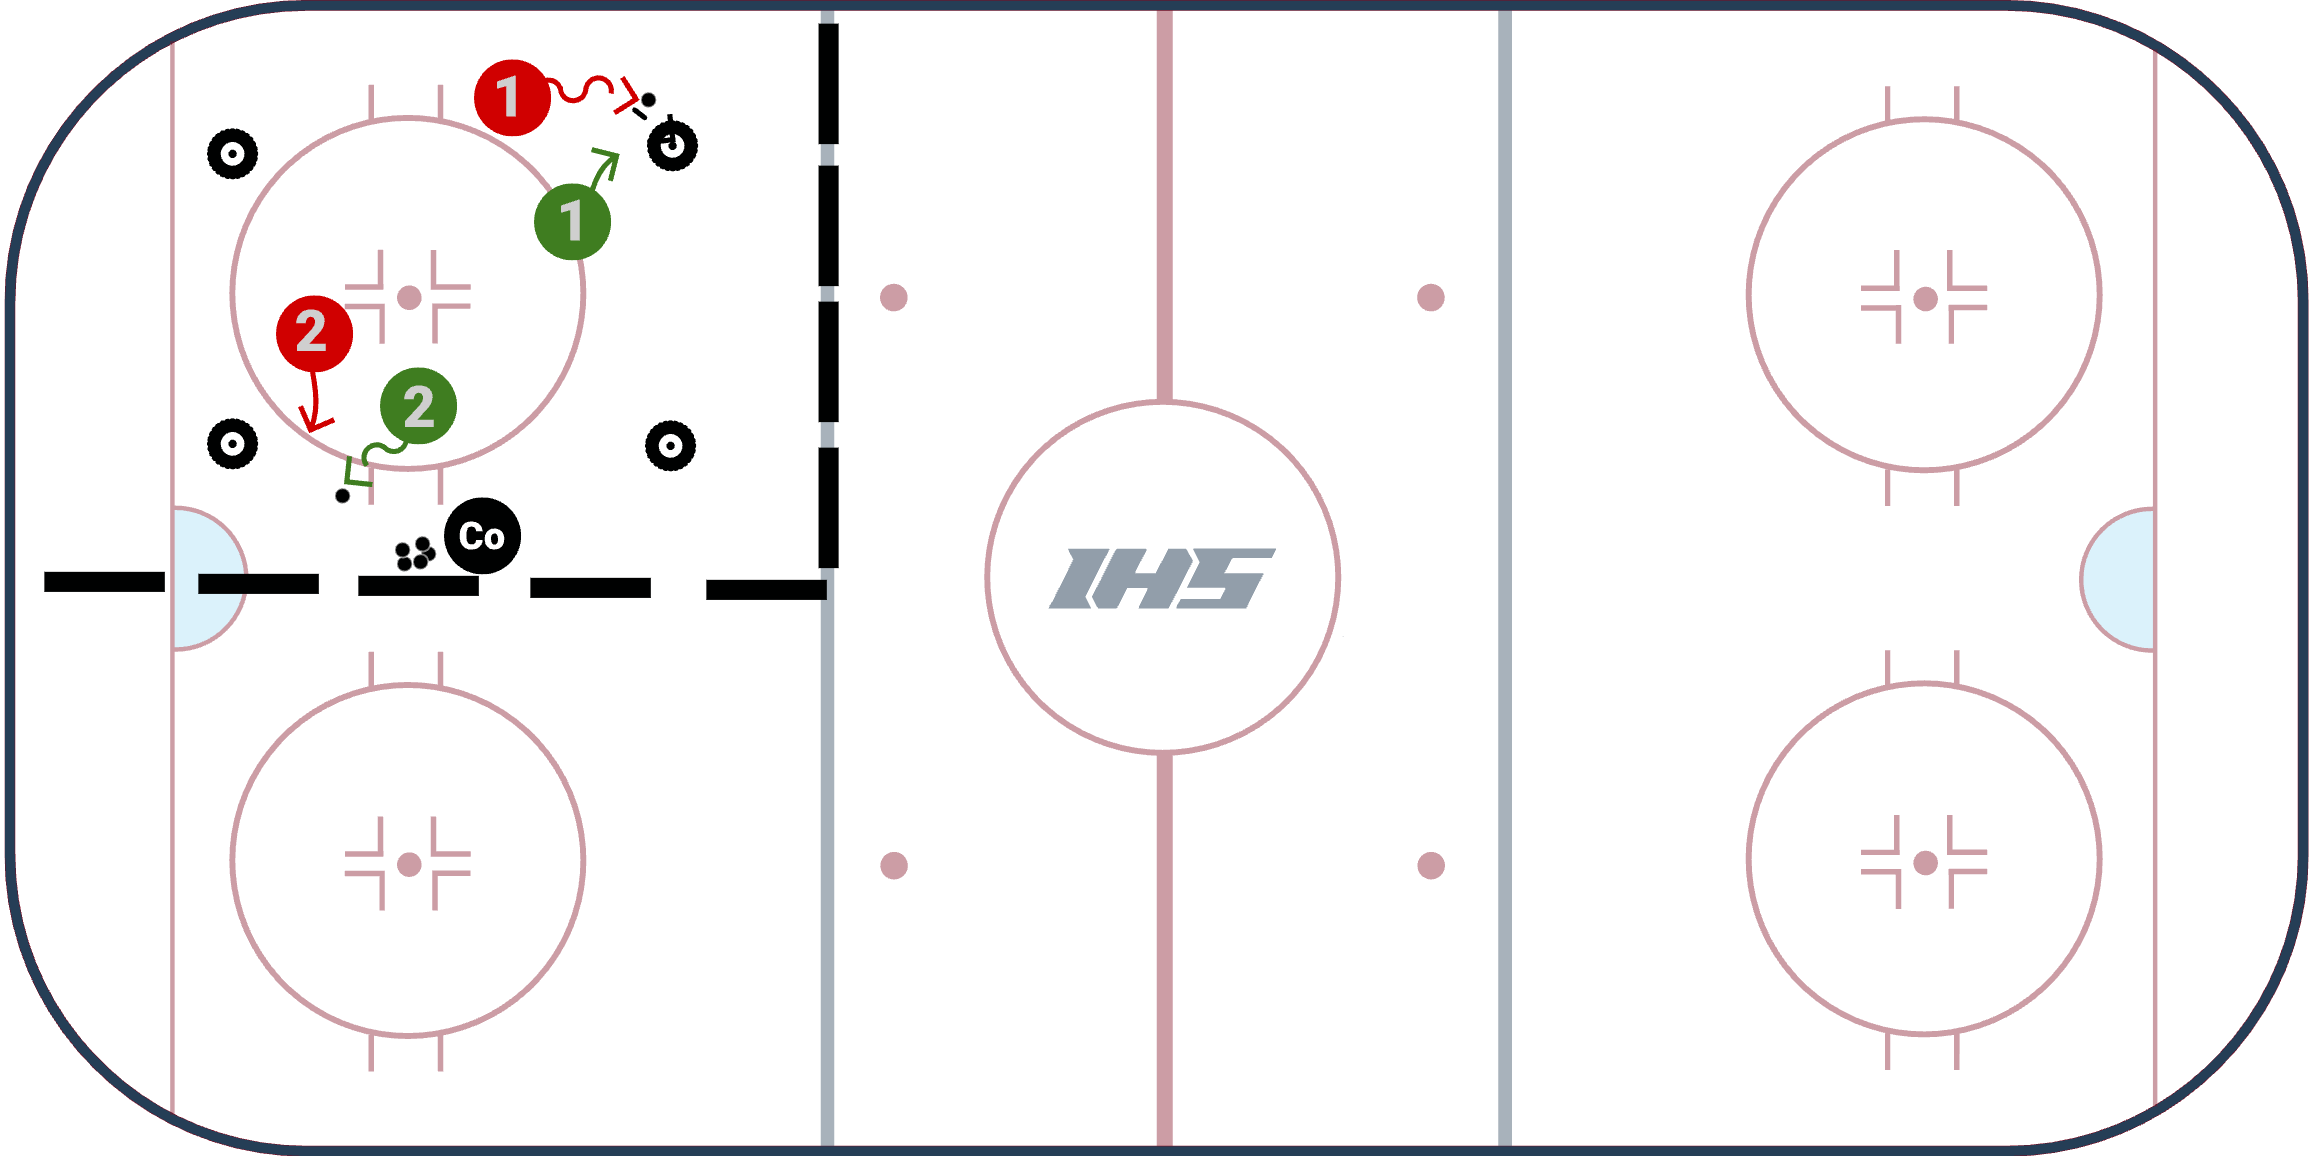
Corner Tires 1 vs 1 Multiple Games 1/6 Ice Station
This a variation of the Corner Tires game that is great for a sixth ice station. In this version the players play 1 vs 1 but there are multiple games going on at one time so players still need to play with an awareness. It is up to the coach to decide if they want to allow for 2 or 3 games to be going at once.
Set Up
Place a tire in each corner of the station as shown in the diagram. The coach has the pucks on the edge of the station with players lined up on each side.
How the game is played
The coach starts by dumping a puck into play. The first two players will compete for the puck. The objective is to hit one of the tires on your opponents side. If a player hits a tire then their opponent picks up the loose puck and continues the play. Coaches blow the whistle after 60 - 90 seconds and all the player go back to line and the coach begins a new round. Players can keep track of how many times they hit their opponents tire.
Credit: animation produced using Hockey Coach Vision.
2 V 2 Any Net Game
Description
The 2v2 Any Net game from Kendall Coyne Schofield is a great small area game with a unique setup that requires an extra level of awareness. This game hits on all of Kendall's small area game themes including; moving, thinking, working, creativity, decision making and fun.
Setup
- Setup 2 nets, 1 in the normal crease and the other straight ahead of it past the circles (facing the center of the ice)
- 2 v 2 in the middle of the ice
- 3 stationary support players (or coaches), 1 at the center of the blue line and 2 along the boards at the hash marks
- Players not in the game line up along the blue line to keep the puck in
- 1 puck in play
Game
- To start, coach can pass a puck or chip it in to start a battle
- In order to go on offense a team must pass the puck to any of the 3 support players/coaches
- The support player or coach will pass back to the team who passed them the puck to activate them on offense
- Offensive team can score on either net
- Defensive team needs to force a takeaway and pass to a support player/coach before they can activate to offense
- Coach can change players on a whistle after 30 to 40 seconds
- Coach can throw in a new puck when:
- The goalie covers the puck
- The puck goes out of play
- A goal is scored
- Keep score!
Coaching Points
- Stay alert - this setup requires the players in the 2 v 2 to be on high alert of their surroundings. Head should constantly be on a swivel when defending.
- Jump to open space - after passing to your support player/coach you need to work to find open space to receive the puck back in scoring position
- Communication - there is a lot of strategy that can go into this game, talk with your teammates before, during and after each shift to develop a strategy that works with your skill sets

1 on 1 Tips for Defenders
Coaching Points for a 1 on 1 (Defensively)
- On a rush the defense as to try and match the speed of the attacker.
- In defensive zone you have to take a good angle and try to dictate where you want the opponent to go.
- Make sure stick is on the ice with entire blade on the ice if possible.
- Use short stabs and not a sweeping motion to acheive stick on puck.
- Always face player and never turn back on opponent.
- Keep stability and never lunge at the opponent.
- Keep your eyes focused on the chest, not the puck.
- Try to go blade on blade while finishing with your body.
Additional 1 on 1 Resources
IHS Member Resources:
- Winning 1 On 1's In Hockey: a 40 minute video webinar from Topher Scott of The Hockey Think Tank.
- IHS Members can create their own practice plans that look like this. Learn how here.
